Tag Archives: nail art

Multi-Chrome Nail Art – Guest Post From Life In Lacquer

Hello!!

I’m Jade from Life in Lacquer and I am so happy to have been given the opportunity to post for you all today!

Life in Lacquer is a blog I write about nail polish and all related things! I am from the countryside in the UK and have been a nail technician since 2010.

I have recently become the proud new owner of 3 KBShimmer multi-chrome polishes. They make me think of all things futuristic so I thought I would so for a design featuring geometric patterns. They look like they could be designs for a spaceman’s costume!

IMG_0379IMG_0343IMG_0358

I used a white base and then hand painted on Pigment Of My Imagination. This polish so amazing! I see mostly purple but there are flashes of deep blue, gold and red. It’s like a super pretty oil slick! It was quite tricky to capture all the colours but I think I did a good job.

I then finished of the design by adding a black outline and little diamantes.

IMG_0368 IMG_0339

I CANNOT stop staring at these nails! I don’t think I am going to get much done and that to me is a sign of a great polish. Plus I now have it on my toes too. I may just paint everything with it HA!

It is opaque in three thin coats or you can you it as a topper over black.

IMG_0351   IMG_0364
I hope you have enjoyed my design and thanks for reading!

Jade x

Lifeinlacquer.blogspot.co.uk

IMG_0340 IMG_0345


P.S.

Thank you Jade for such a wonderful post!  Jade provided so many wonderful pictures I could not help but fill the post with them!  If you want to see more art and swatches from jade, head over to her blog, http://lifeinlacquer.blogspot.co.uk/ and Facebook https://www.facebook.com/LifeInLacquer.


6 Step Galaxy Nails Using KBShimmer Polishes

GlaxeyNailsTitlePage

I have to be honest, I am not good at painting my nails, or nail art.  My hands shake, I am not one that can draw, so my nail art is usually stuff I can stick on, dots, or accent nails.  When I saw all of the galaxy nail art popping up on the web and Instagram, I wanted to try it out, and found it to be surprising easy.  In just 6 steps, you can have the galaxy on your nails.

I created a video for you to show you how easy it is.

If you want to play along:

GlaxeyNailsNeededItems

And here is the video!


“Extend-A-Mani” Guest Post By The Pointless Cafe

I’m so excited to be able to guest post here at KBShimmer’s blog! I live where there is no Autumn, so I pretty much keep Autumn on my nails the entire season. Today is no different!

I’ve done one of my “Extend-A-Mani” posts for you using KBShimmer polishes today.

Banner1

I was wearing Dior Cosmic Violine, which is a brown/burgundy crelly and had a bit of tip wear. What to do? Well KBShimmer makes errthang better, right?  So I pulled out Cocoa Nut, 24 Carrot Bold and Every Nook and Cranberry and went to work.

Pic2

On my thumb and ring finger, I just layered one coat of Cocoa Nut over the top. On the rest I did a really quick gradient over Cosmic Violine using 24 Carrot Bold and Every Nook and Cranberry. I use a plain make-up sponge and paint on strips of what I’m using and just dab over each nail a few times and Voila! I use an Elf concealer brush and straight acetone for clean-up around my cuticles.

First, here it is matted (I used butter LONDON’s Matte Finish)

Pic3

And then I used KBShimmer Clearly on Top top coat. I love matte finish, but in this case I preferred it shiny.

Pic4

And close-ups…

Pic5

I really love this mani. 24 Carrot Bold and Every Nook and Cranberry are great on their own but they also layer well and gradient well.  I do love versatility in a nail polish!

What do you think? Come on over to my blog, Pointless Café, and see me sometime! (Yes, I said that in my best Mae West voice.)

Thanks so much to Christy for having me! ♥

A Note from KBShimmer:  We are always excited to have guest bloggers, and Sheila does such amazing work!  Thank you!  Shelia used Cocoa Nut, a 2012 winter polish that was retired this spring.  Due to the many requests to bring this polish back, we have!  Cocoa Nut is now live on our site and will be available thru the end of the year.  So get this cool weather favorite while you can!

Summer Gradient by Kayla Shevonne

Hey there!

This is Kayla from Nails by Kayla Shevonne. I’m quite honoured to be posting on the KBShimmer blog today! I absolutely love KBShimmer nail polishes and it’s the indie brand that I own the most of by far! So when Christy asked me to write a guest post, I had a pretty good idea what type of manicure I wanted to do.

kbshimmerguest3wm

To create this bright and fun nail look, I first layed down a base of a plain white creme and let that dry completely. I then pulled out KBShimmer Don’t Pink Twice and 24 Carrot Bold, both of which are beautiful matte shimmer polishes from the Summer 2013 Collection, and I used the sponging method to create a gradient with them. Next, I added two easy coats of KBShimmer Grayscale, a super fun black and white glitter top coat that was also released with the Summer 2013 Collection. Finally, I finished the whole look off with the KBShimmer Clearly On Top Quick Dry Top Coat.

kbshimmerguest1wm

Don’t Pink Twice and 24 Carrot Bold blend together beautifully, so the mani looked pretty awesome even before I added Grayscale. But I think the contrast of the black and white glitter over the super bright pink and orange really makes the whole mani pop.

kbshimmerguest2wm

Thanks so much to Christy for inviting me to do a guest post on her blog. I hope to do one again someday. And if you’re interested in seeing more of my work, please visit my blog Nails by Kayla Shevonne.

kbshimmerguest4wm

Thanks for reading!

KBShimmer Says: Thanks Kayla for the stunning manicure and the guest post. Are you a blogger that would like show of your KBShimmer manicure in a guest post? Contact us at sales at kbshimmer dot com.

Orange Pop with Tape Stripe Accent Nail

This weekend I am attending a conference and wanted to try some nail art to accent my nail polish.  I have to say that I can not draw, or paint, nor do I have steady hands that would allow me to create nice dots or stripes by hand.  I remembered I saw someone on Pinterest use tape to create stripes and decided to give it a go.  I have to say I am quite pleased with how it turned out.  I took step by step photos to share.

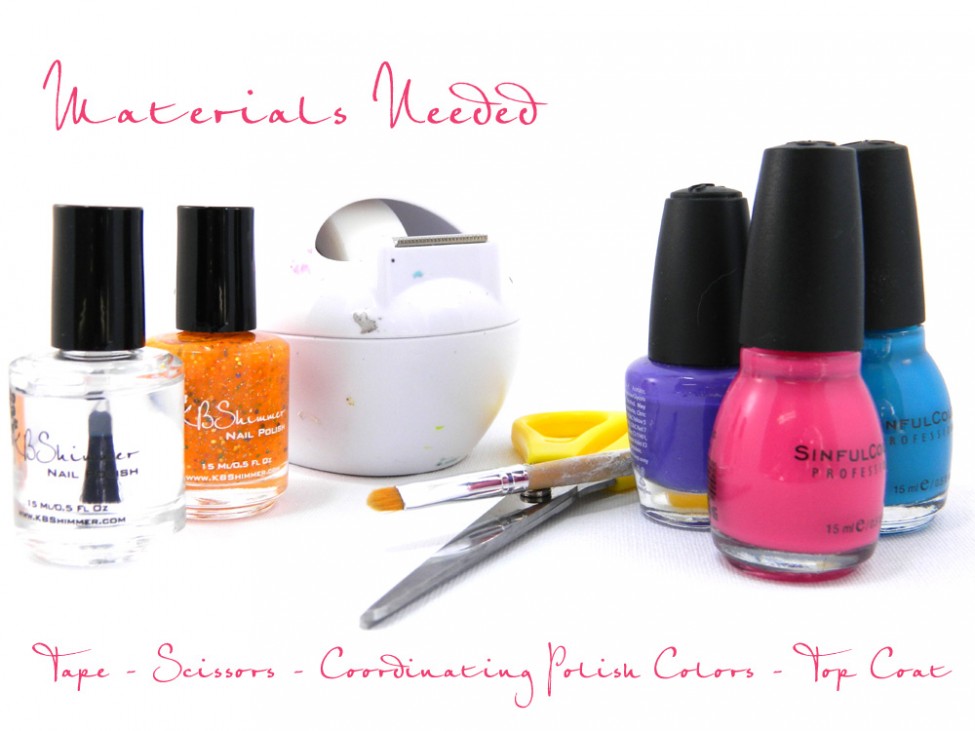
To start, I chose Orange Pop to be my base color.  I used three coats of Orange Pop, and did one coat of top coat on all the nails before applying the “artwork”.  I selected three creams in teal, purple and magenta to compliment the glitters in Orange Pop.  The color of the blue polish is actually more teal in person.

I then gathered my scotch tape, a scissors and top coat.  The tape is my workshop tape, so you can clearly see that it is well loved, and “decorated” with splashes of polish.

MaterialsNeeded

I then painted three stripes onto the tape, without removing it from the holder.  I let the tape dry before removing.  I chose polishes that covered well in one coat, but you could add a second if needed.

PaintColorsOnTape

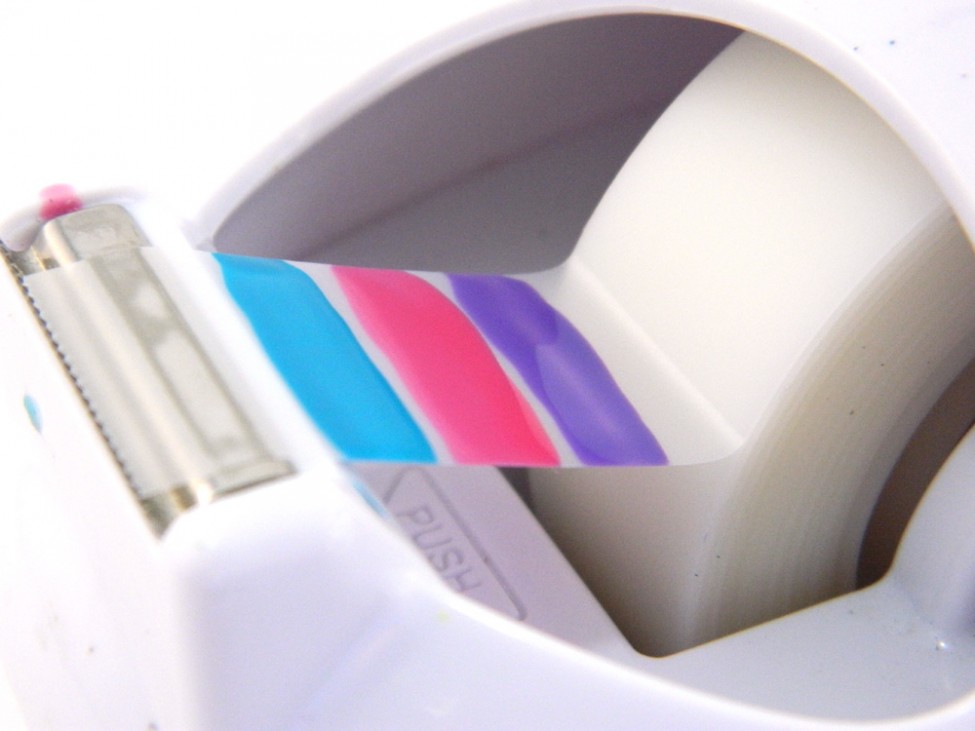
When dry, remove from holder.  I cut close to the last color so the tape was not so long it folded back onto itself.

RemoveTape

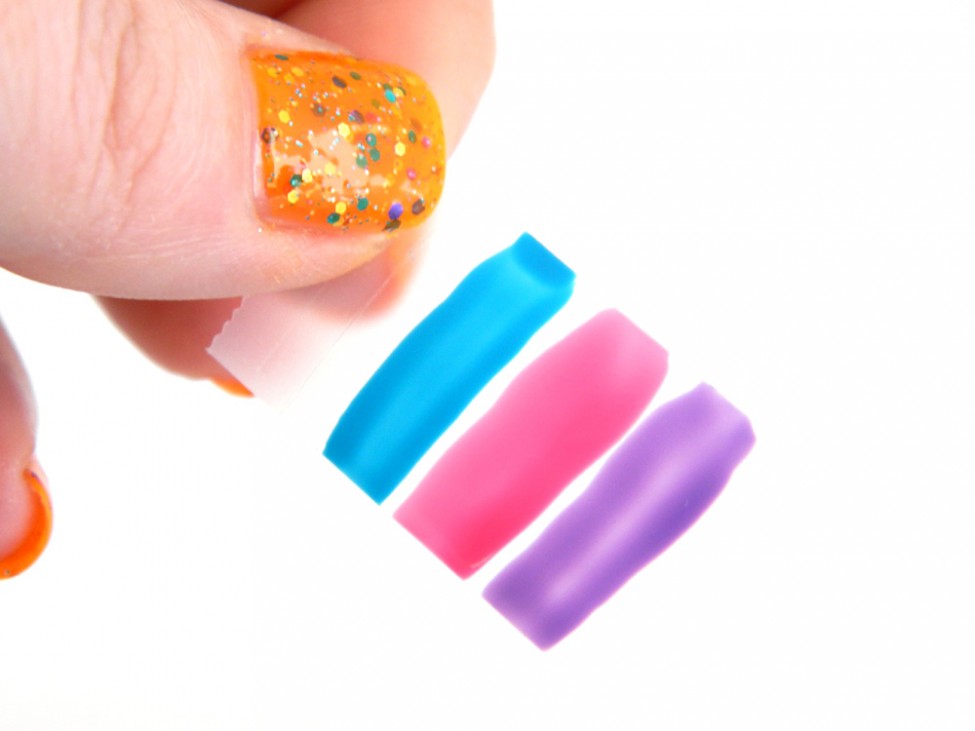
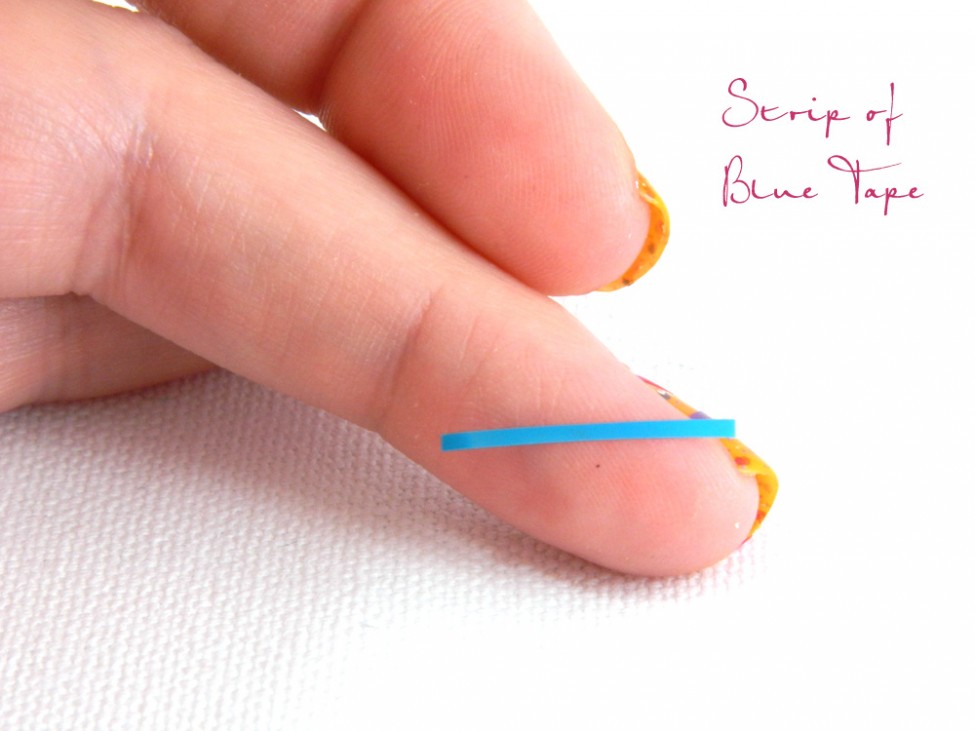
Then using your scissors, cut a strip of the first color.   I cut my strip to be 1mm wide.

CutIntoStrips

With the painted side up, sticky side down, stick the stripe onto your nail.   I stick the strip so that one edge lined up with the edge of my nail.  Do not press the longer edge down.

PurpleTape

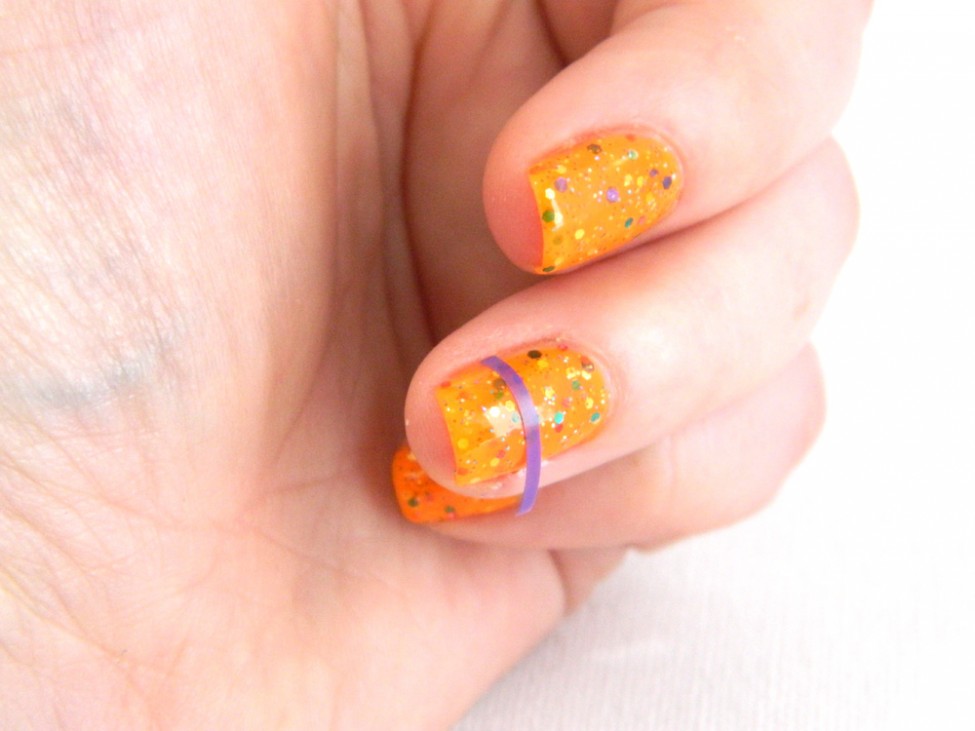
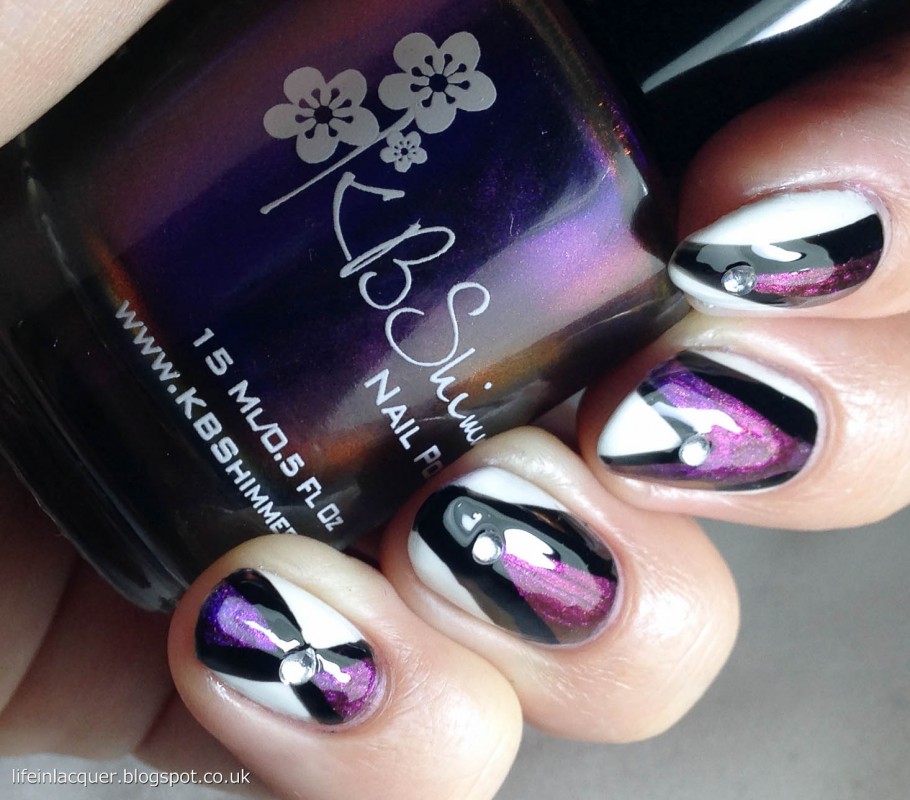
Using your scissors, trim the long edge of the stripe to fit your nail.  It might be easier if you have cuticle scissors, but regular ones worked fine.  After trimming, press the rest of the stripe down.  Looking at the micro shot, you can see some of the glitters through the stripe, but you can not see that at a normal distance.

PurpleStripOn

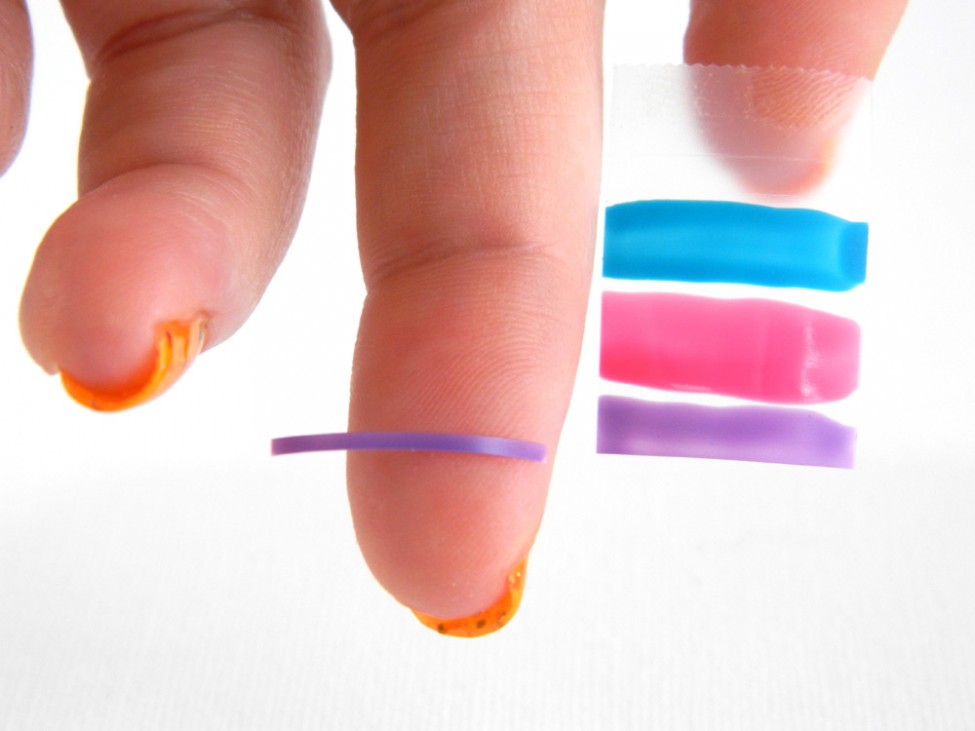
 I then moved on to the pink, cutting a stripe from the tape.  I placed it on my nail at an angle so that it crossed over the purple stripe.

PinkStripOnNail

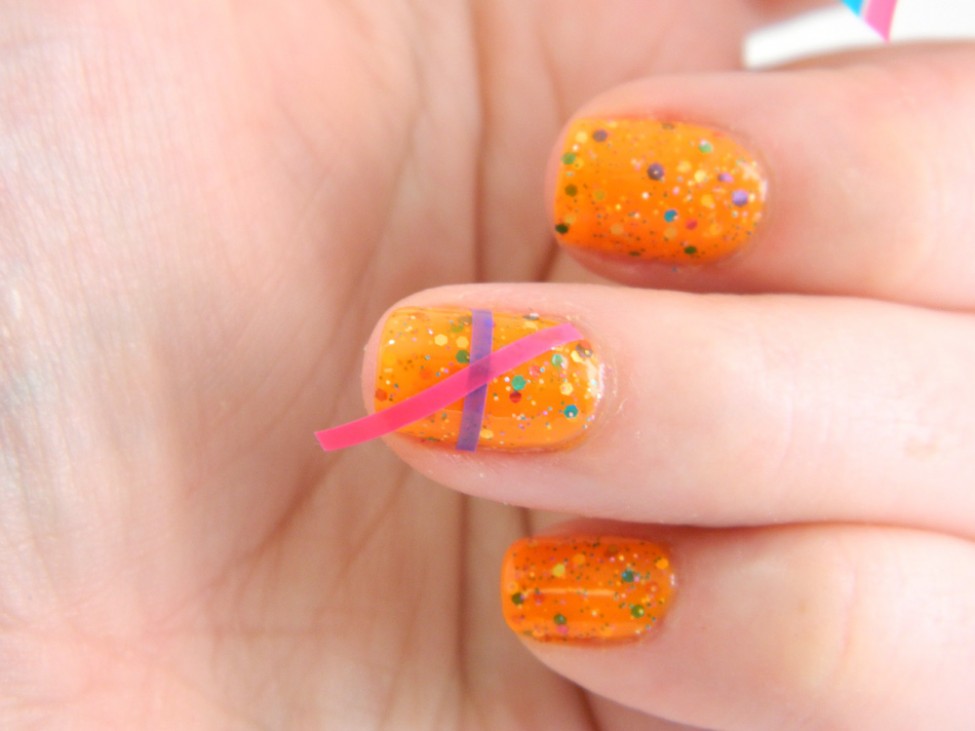
Again, trim down the strip and press down so it sticks to your nail.  Move on and cut the last strip, using the blue color.

BLueTape1

I then stuck the blue to the nail, going across the opposite direction of the pink, so that the stripes form a asterisk.

BlueStrip

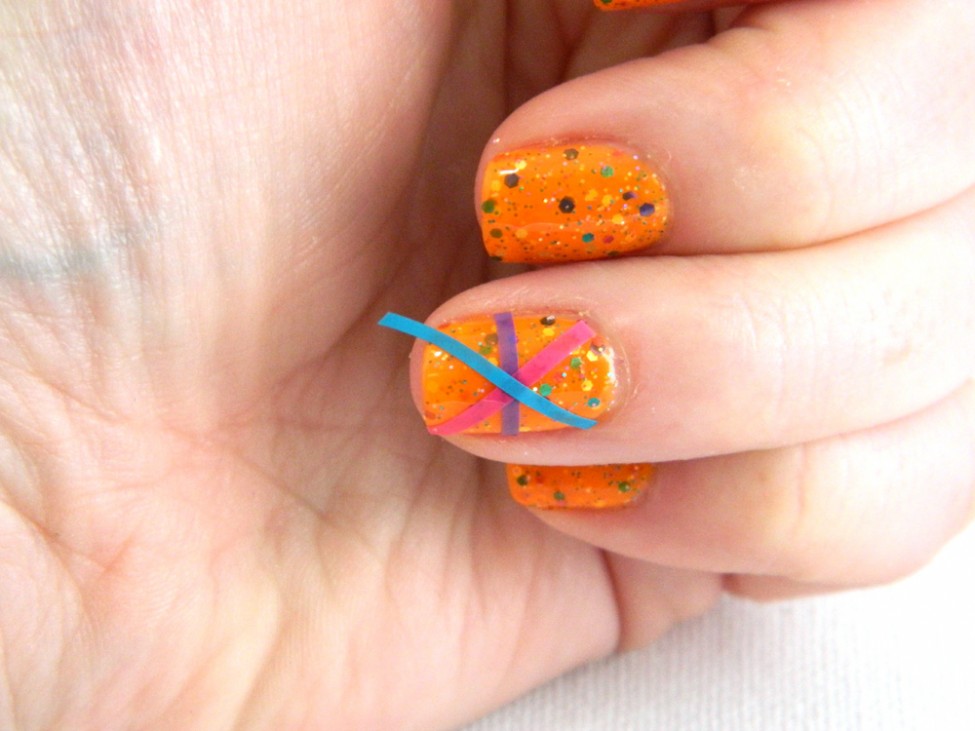
Again, use the scissors and trim off the excess.

CuttingOffExcessTape

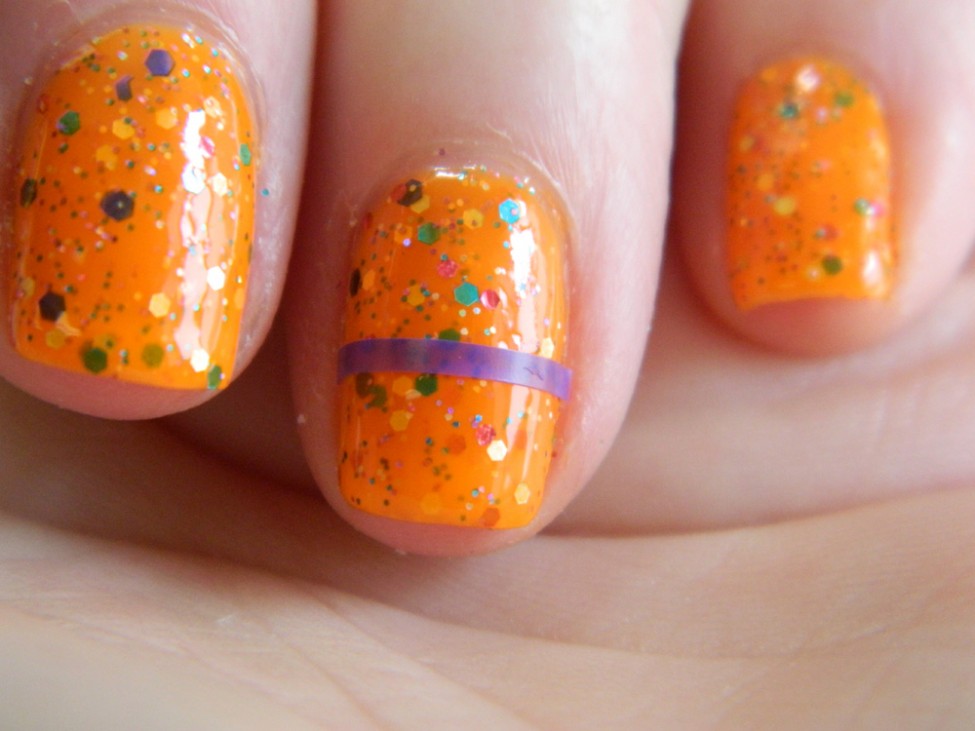
When complete.  Press down tape, ensuring all edges are secure on the nail.  Then cover with at least one coat of top coat to seal.  I did two coats to ensure it was smooth.

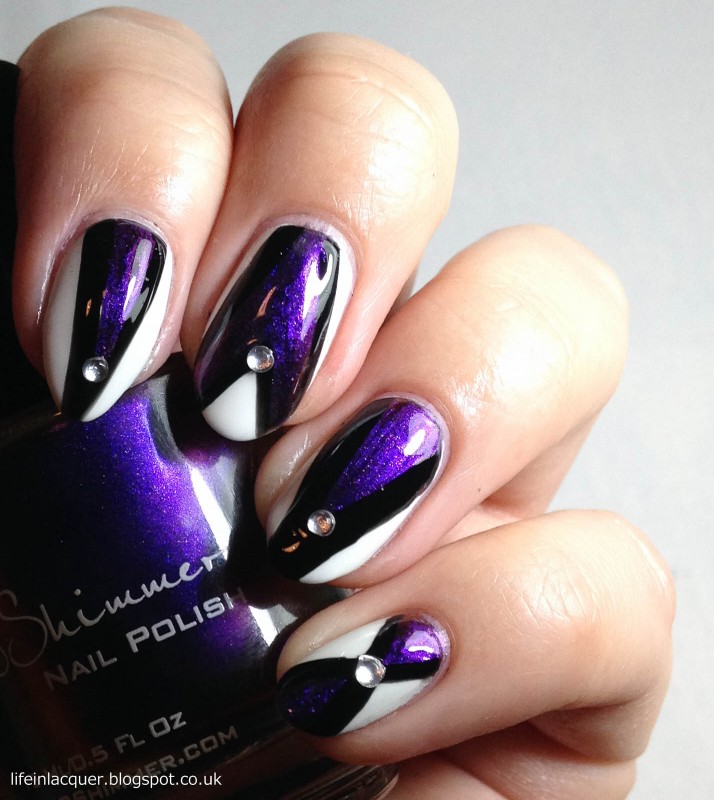
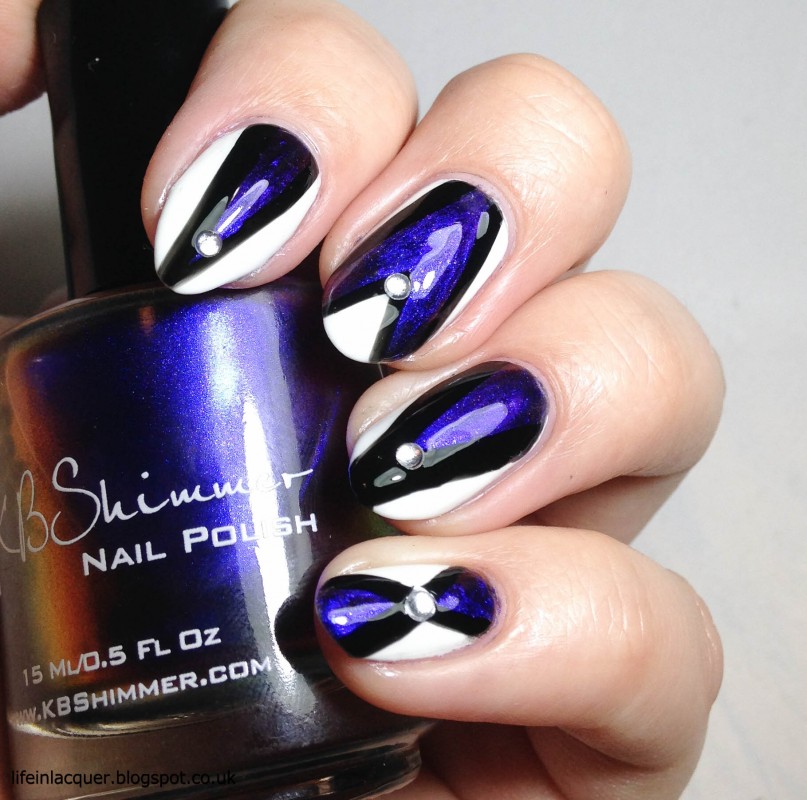
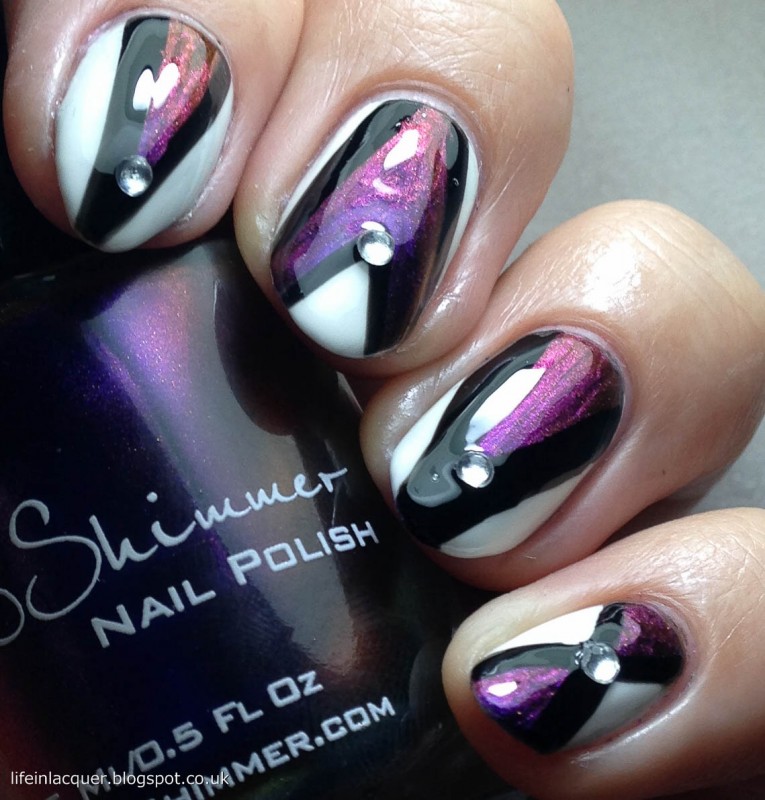
And here is the finished look!

Done

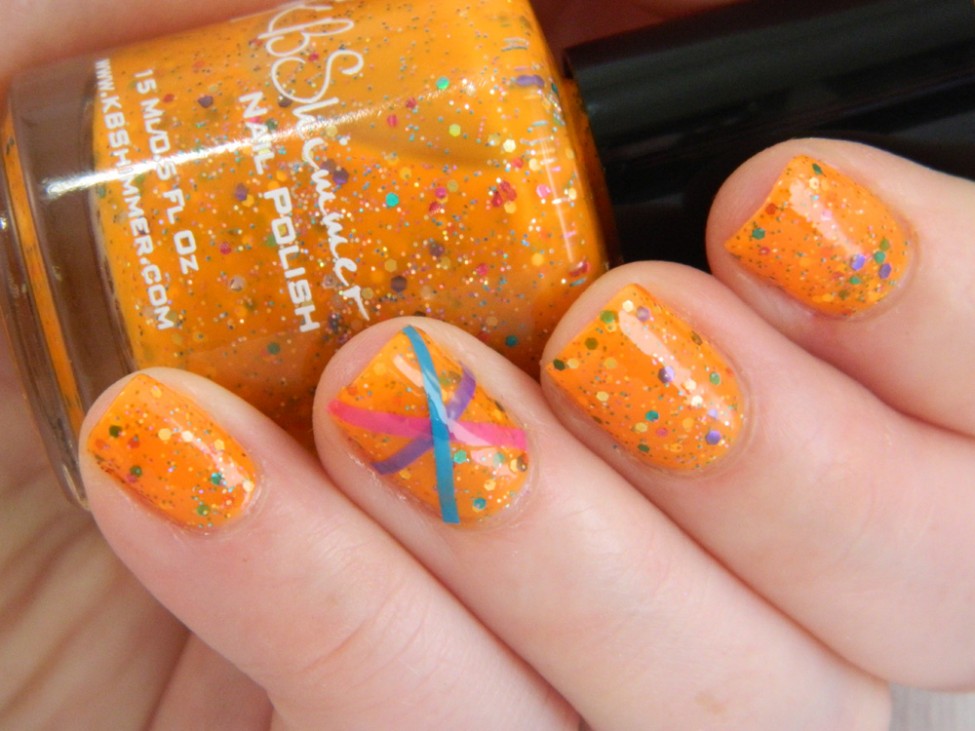
Not bad for having no art skills at all.  Next time I would probably do a second coat on the tape so the polish was a bit more vivid.  I think the pink blends in a bit too much.  There was plenty of painted tape left over, so repeating on the other hand would not be an issue.  I could also see myself using punches to create shapes from painted tape.  Maybe a scalloped nail edge or flowers.  I have to give props to all those out there that can create murals and designs freehand.  If you have any you created using KBShimmer polish, or with KBShimmer polish as a base, send it to CustomerService@KBShimmer.com.  I would love to share them on here!

Christy