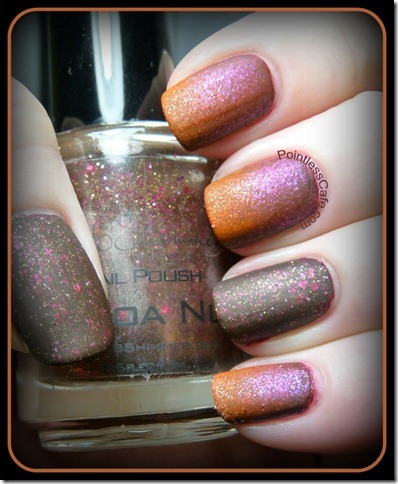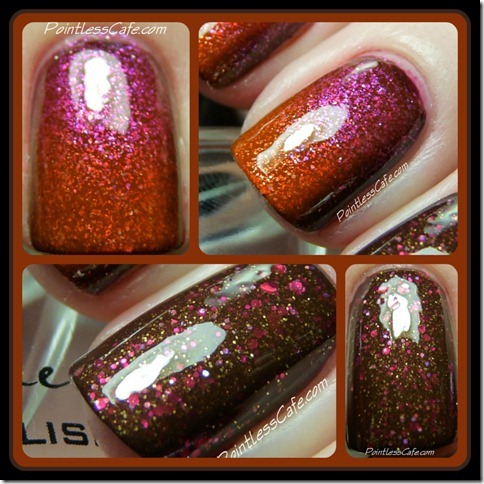
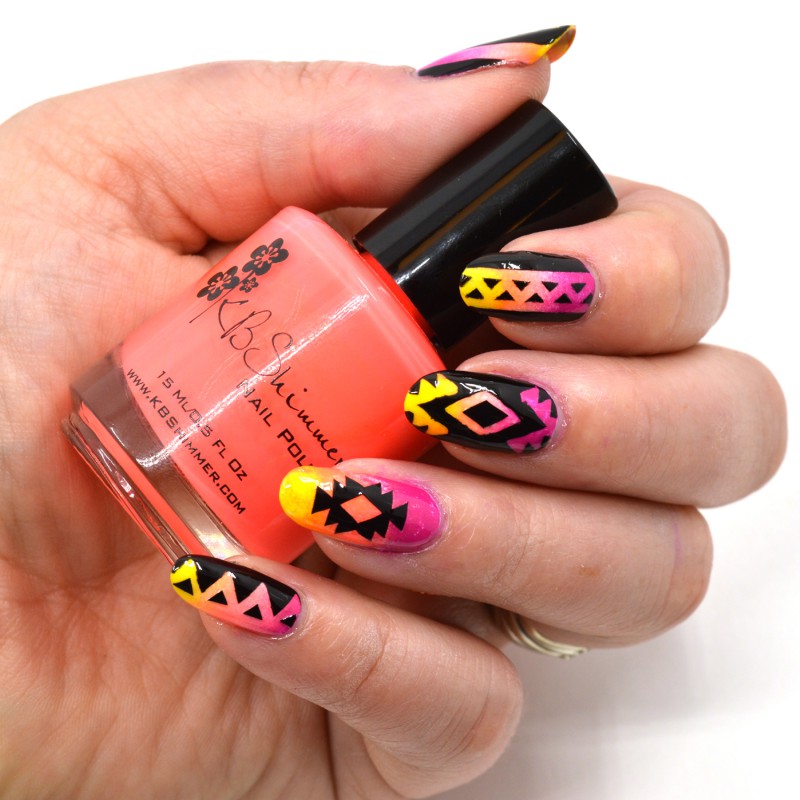
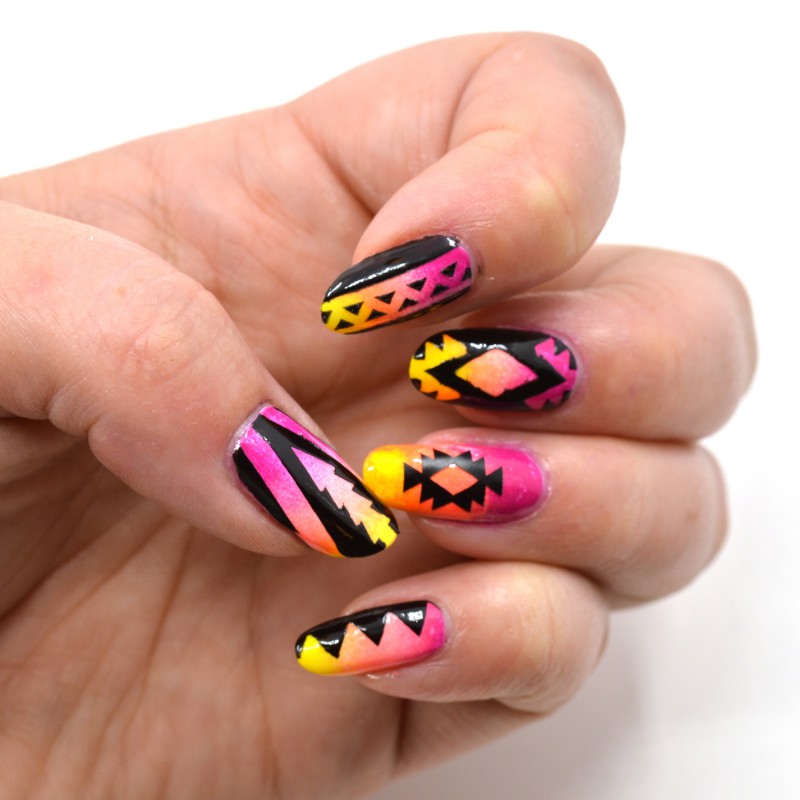
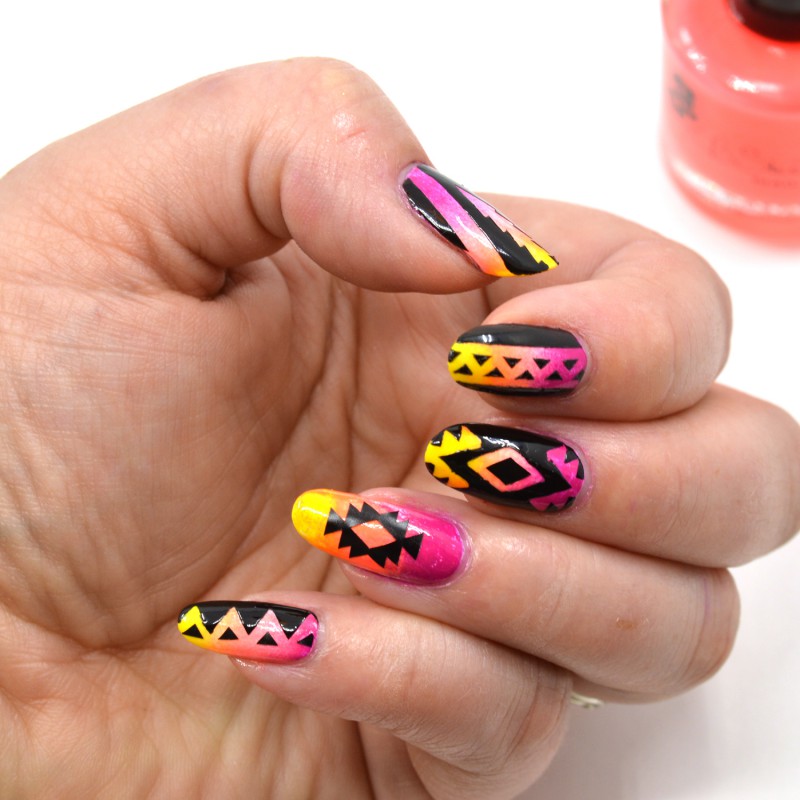
Nail vinyl decals are a fun way to add art and design to your manicure. Today, I am going to show you step by step how to create the summer look below using a gradient technique with Life Rose On, You’re So Shellfish and Chick Me Out along with Eclipse and our new Tribal Themed Nail Vinyl Decals.
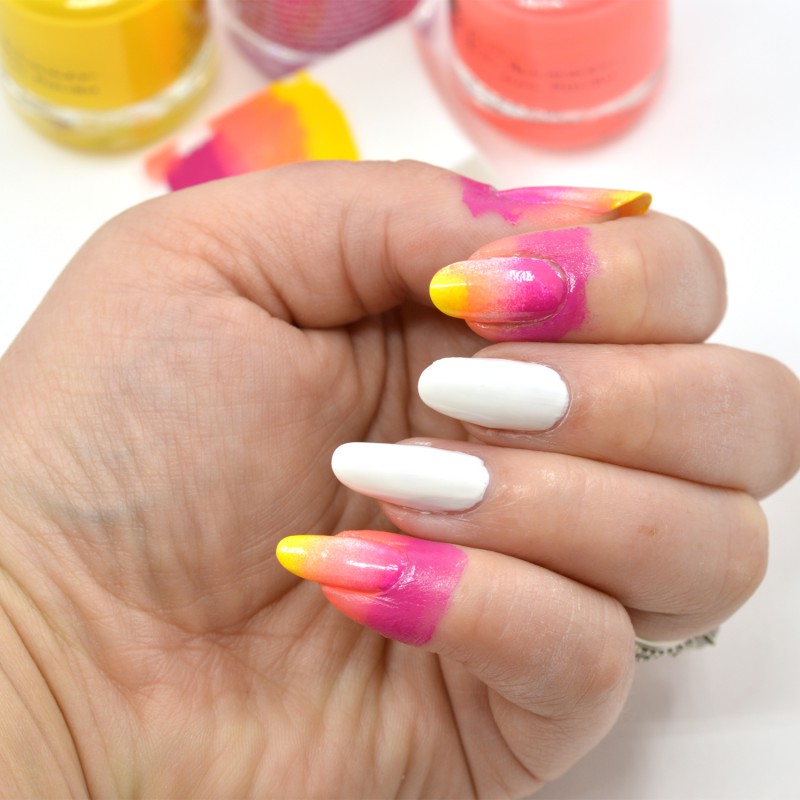
First, start with a white base to make the gradient colors pop. I used a white from Wet and Wild, but any white will do. You can see the white on my middle two fingers.
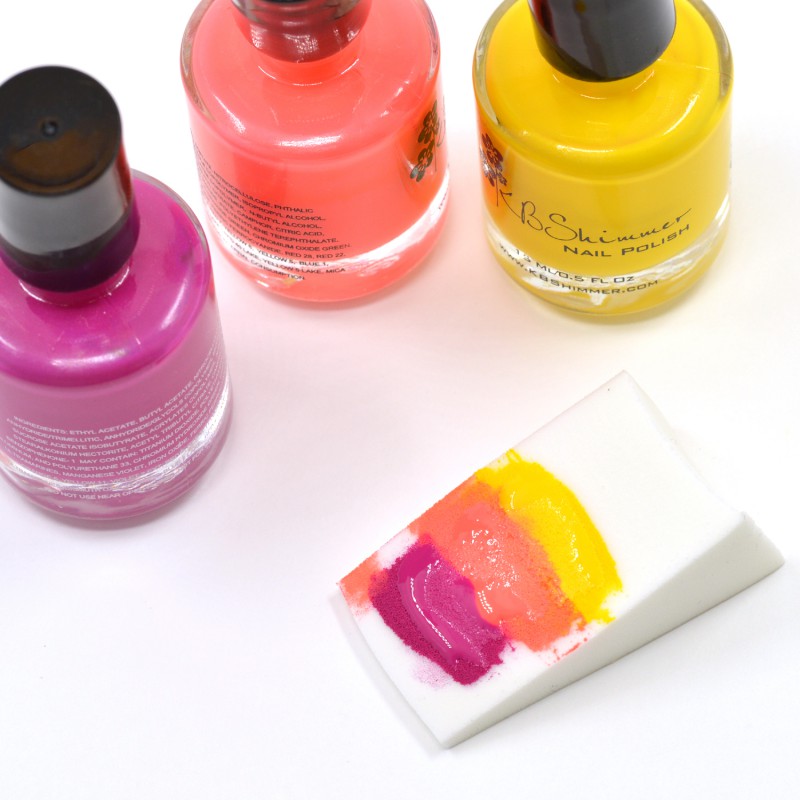
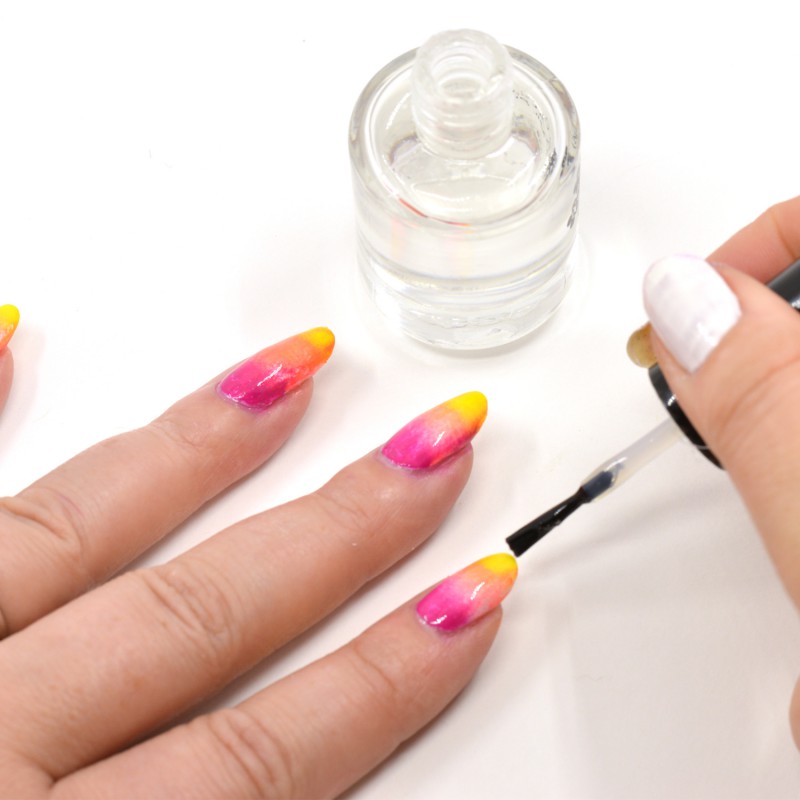
Next, using a cosmetic wedge, paint on a stripe of each color. I did this twice for each color as the sponge sucks in the polish.
Take the sponge and position above nail you want to paint. In a dabbing motion, use sponge to apply polish to nails. Try and move it top to bottom a tiny bit to blend the color. Do this quickly and lightly, as too many dabs or lots of pressure will pick up the polish from the nail leaving bald spots.
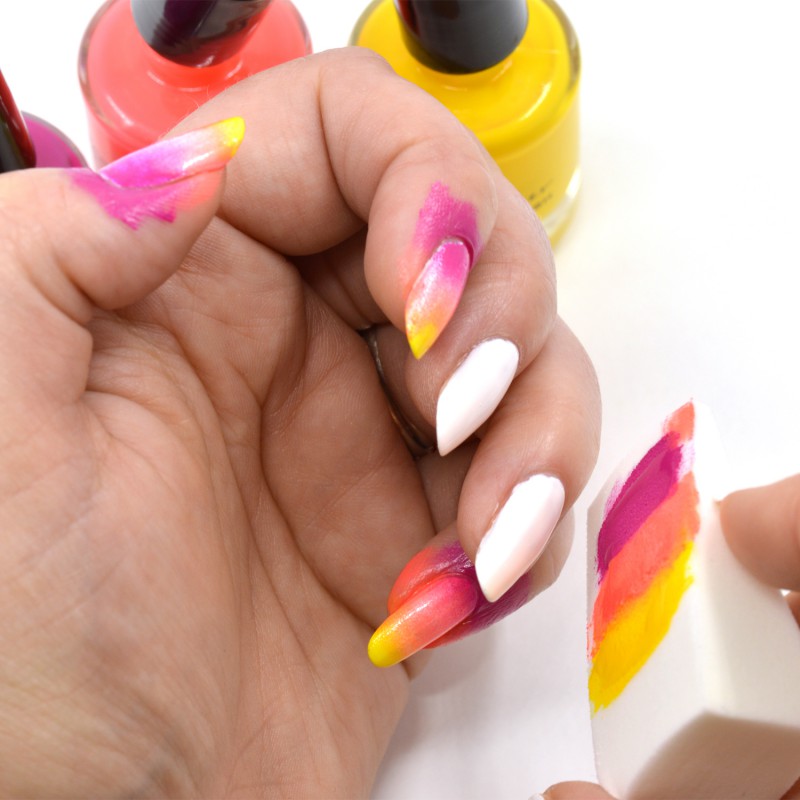
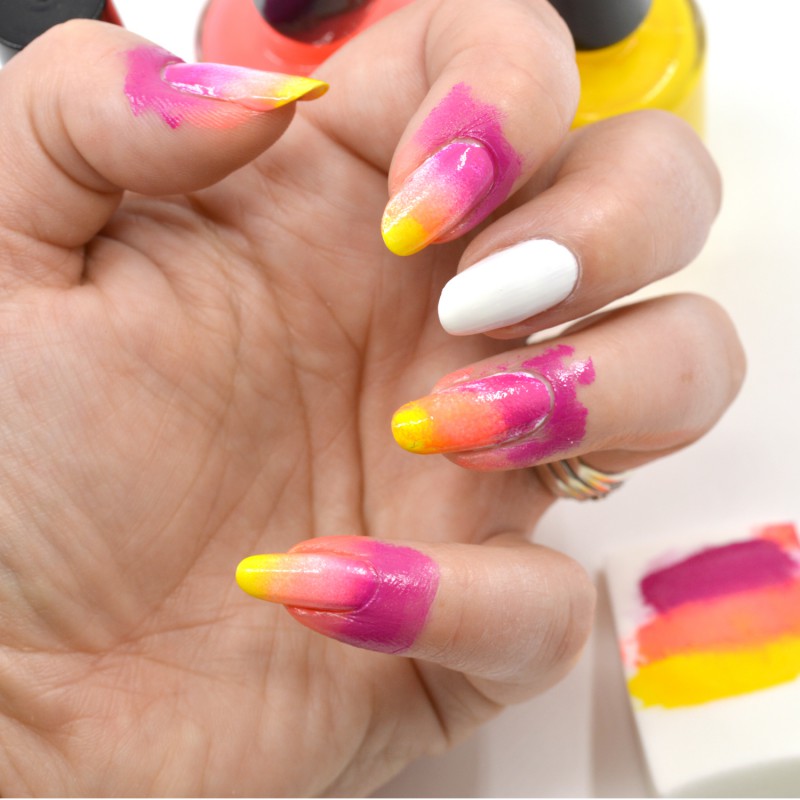
Repeat on additional nails by again painting stripes on the wedge, touch up any blank spots around nail edge with corner of sponge.
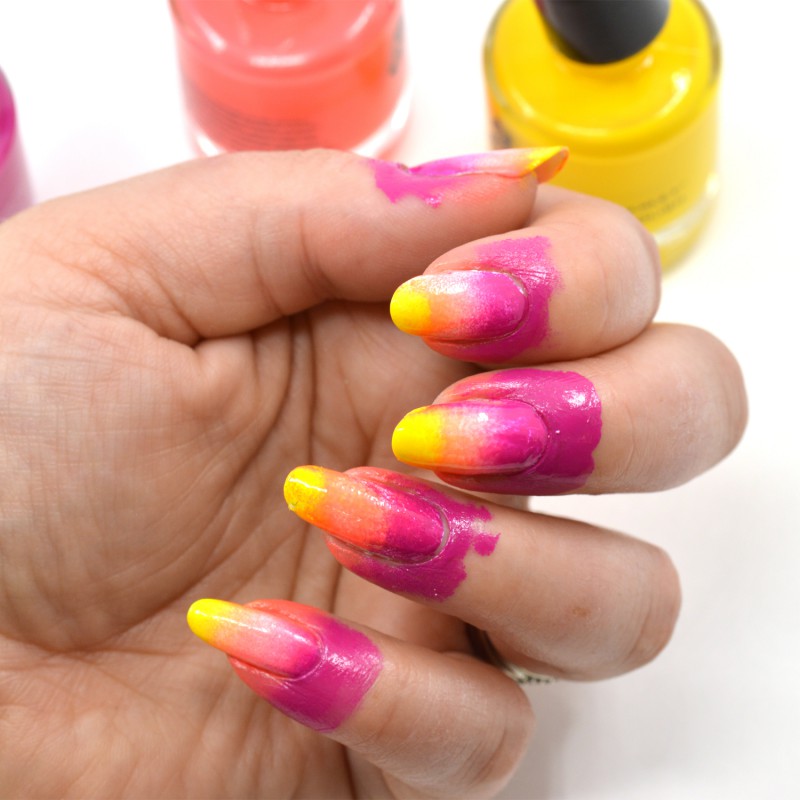
Clean up fingers with acetone and brush. Cleaning up now will make additional clean-up easier later in the process.
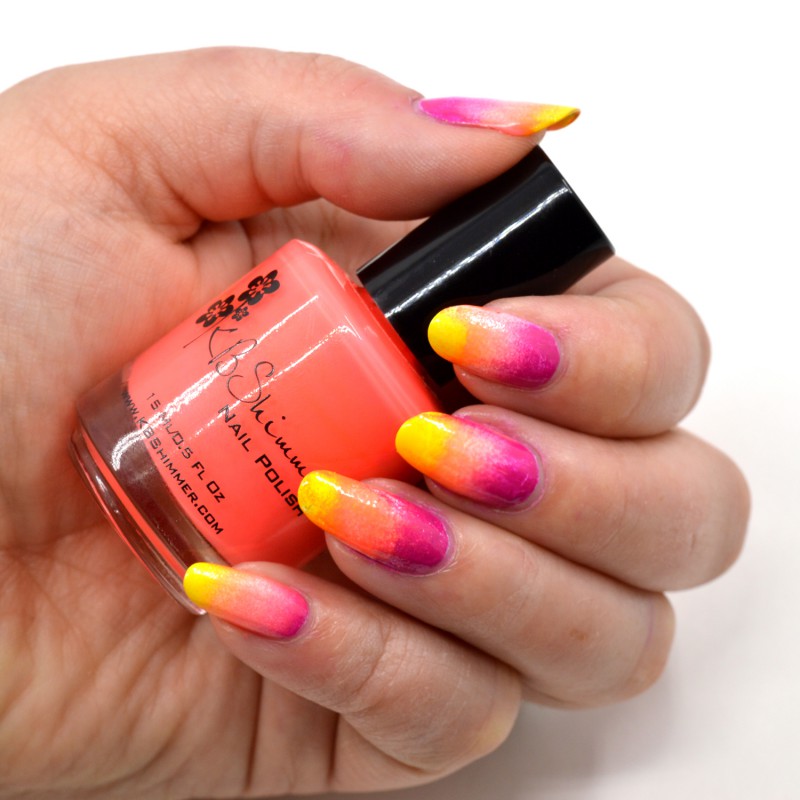
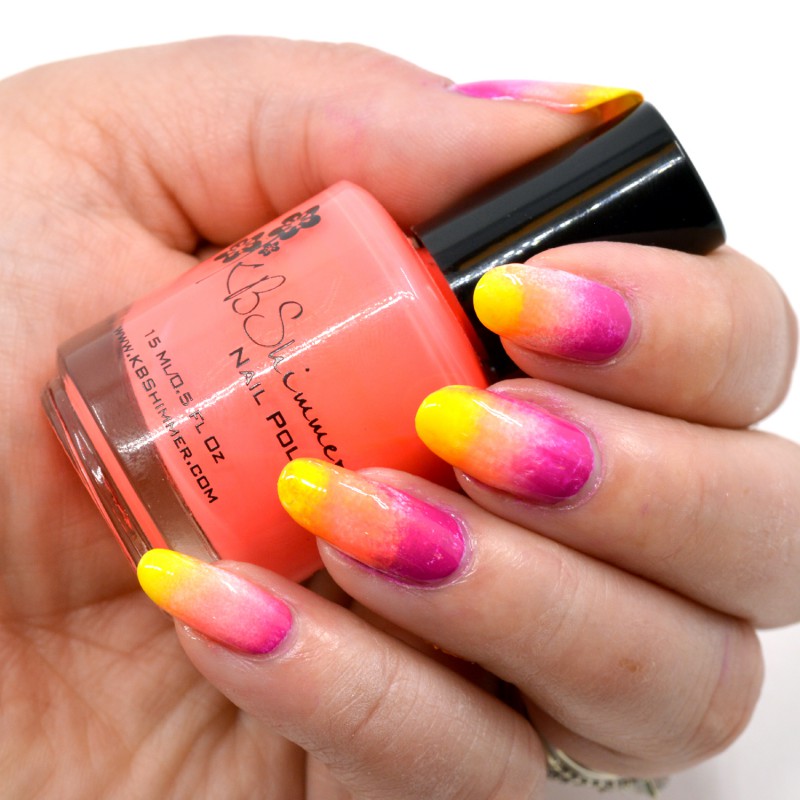
Here is the look after clean-up.
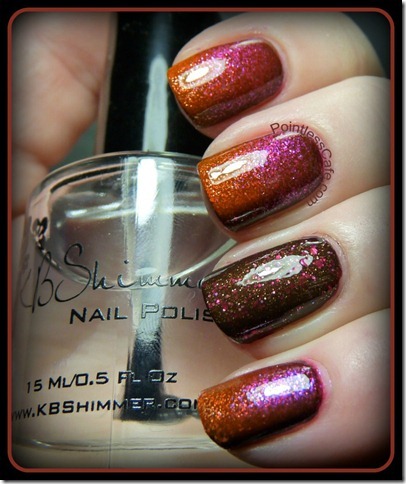
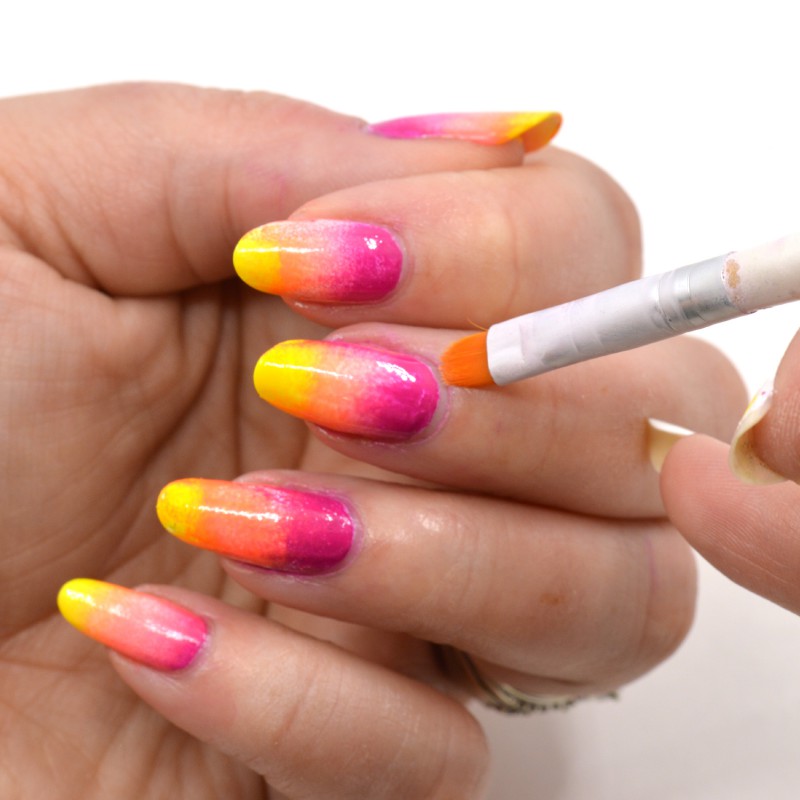
At this point, you can just let the colors dry. But I like to use Clearly On Top to ensure that the polish is completely dry before moving on to the next step.
Either way, make sure to wait at least 20 minutes before moving on to the next step so vinyl decals do not ruin polish when removed later on. Adding a top coat will also help smooth out the look of the gradient and, if you happen to get some polish that seeps under the vinyl decals, the clear coat will provide enough of a barrier between the gradient design that you can use a clean up brush and acetone to remove it.
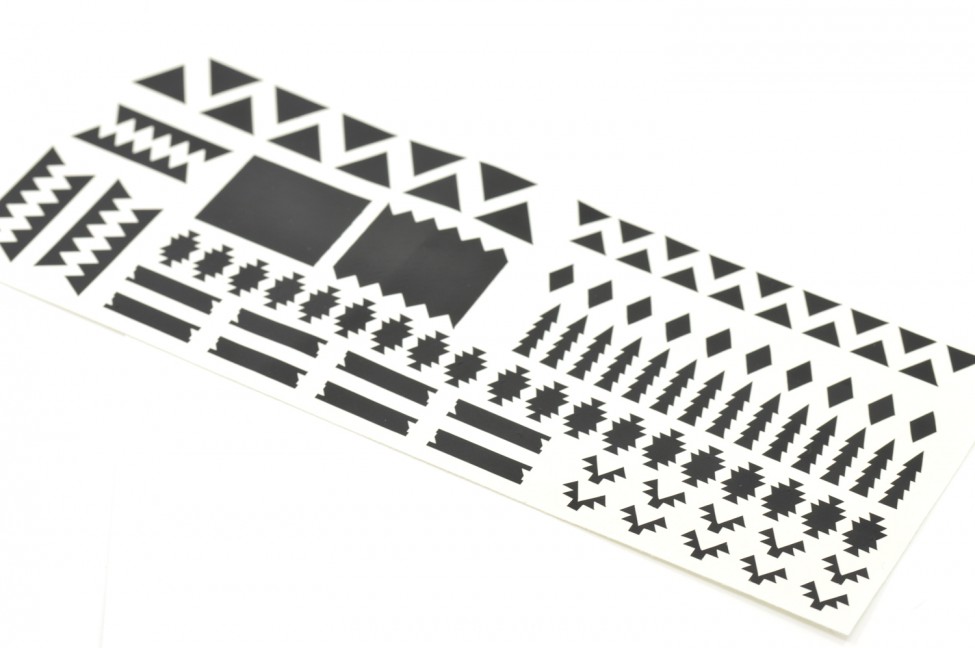
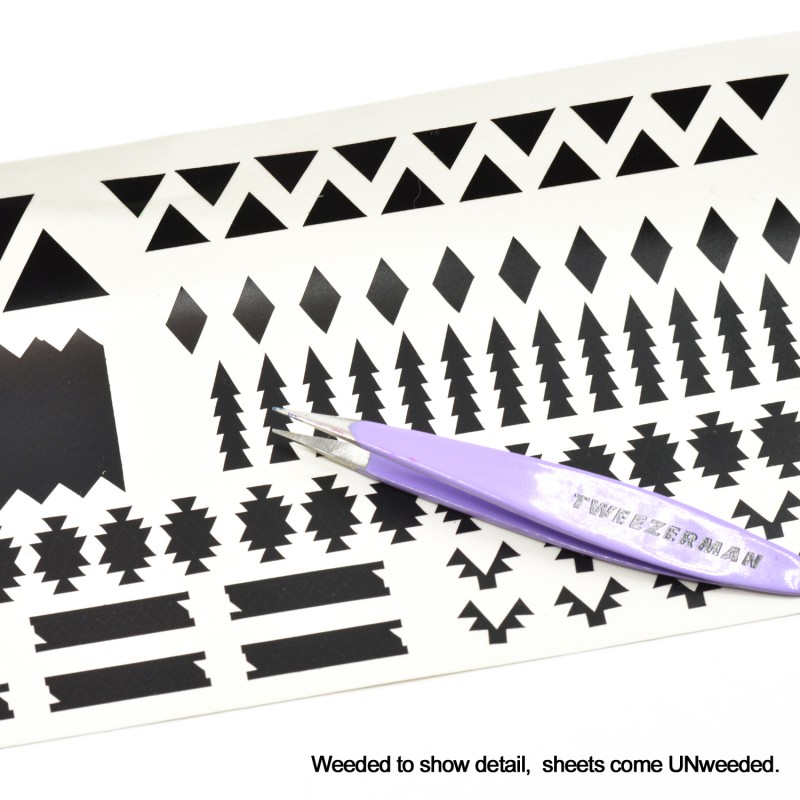
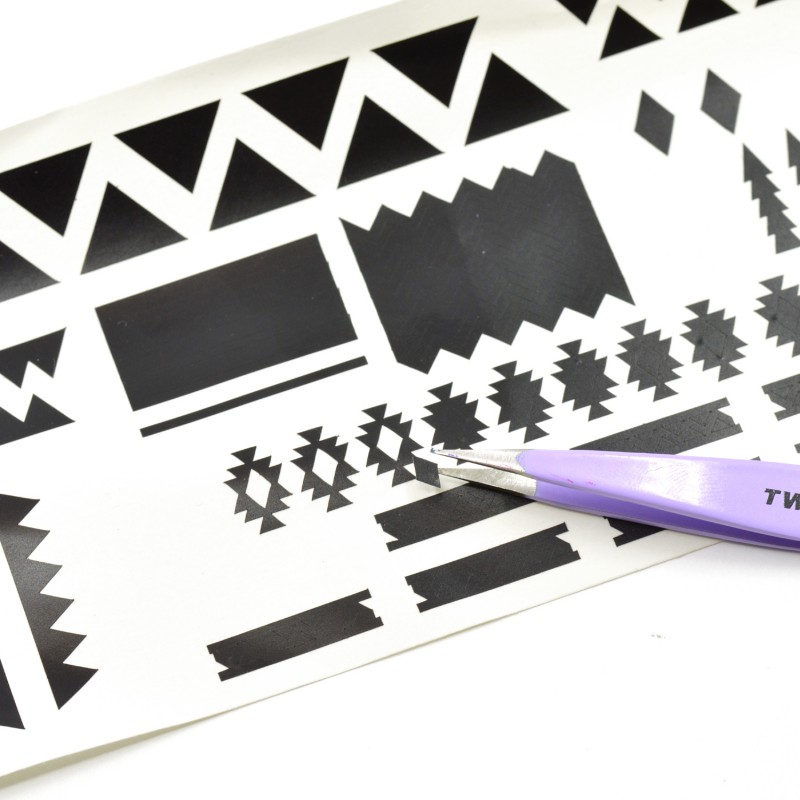
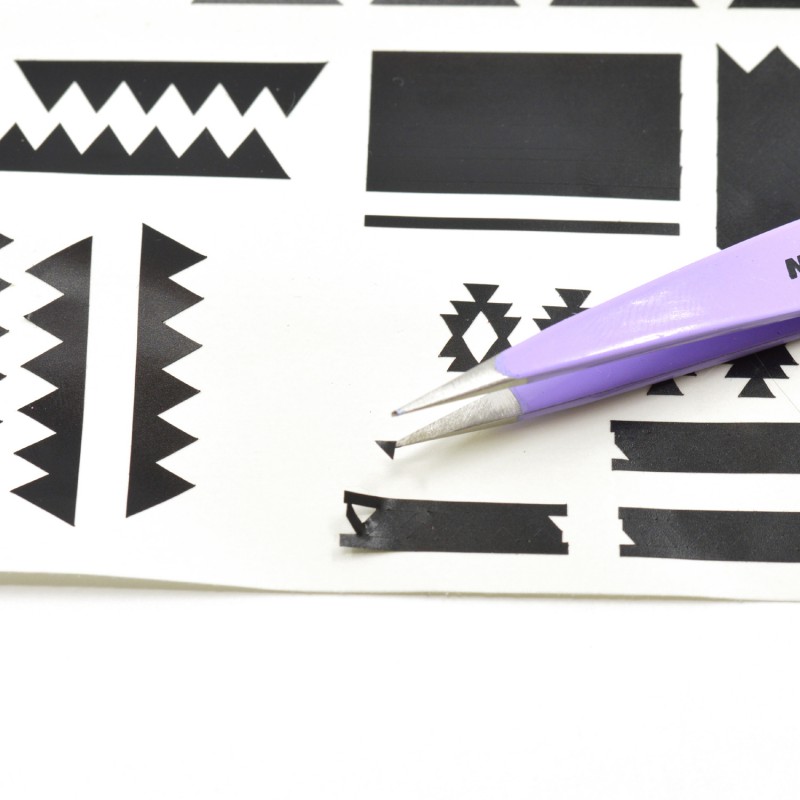
When removing nail vinyl decals from the sheet, I like to use a tweezer to grab and place vinyl. These fine point Tweezerman tweezers are my go to. Some pieces may have additional cutouts inside that need to be removed before use.
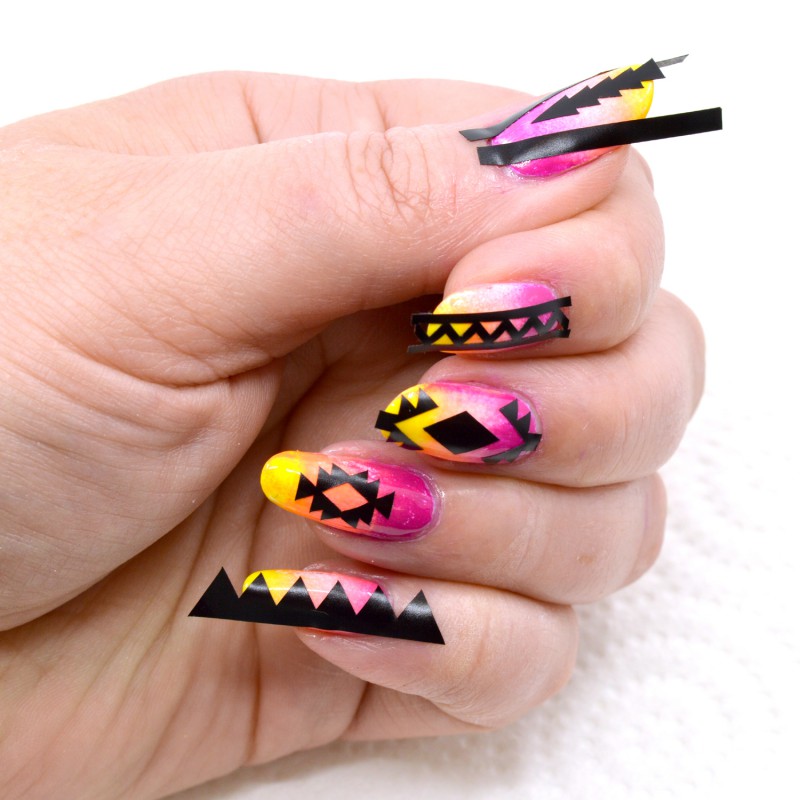
I remove the desired vinyl pieces from the sheet and place on my hand. I then remove and place on my hand once more for pieces I want to later remove (those being used like stencils). This will help remove some of the adhesive that can pull up polish (if polish is not fully dry).

Using your tweezers, place the vinyl decals into nails in the desired positions. Press firmly to ensure that polish will not seep under vinyl decals. Some of these pieces will actually stay on the nail, but for longer pieces like straight lines, let one end overlap the nail for easier removal later.
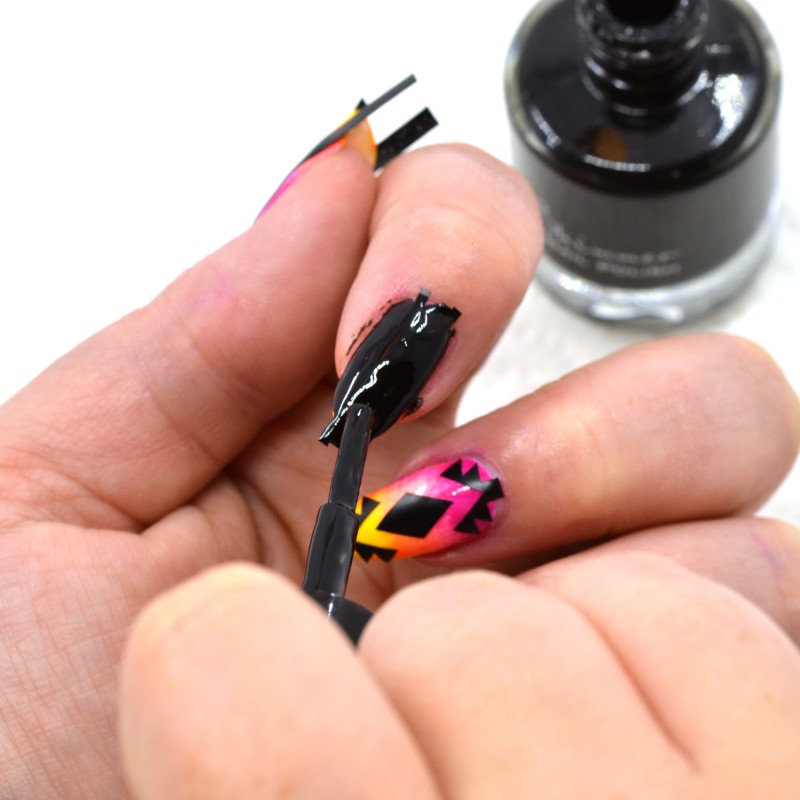
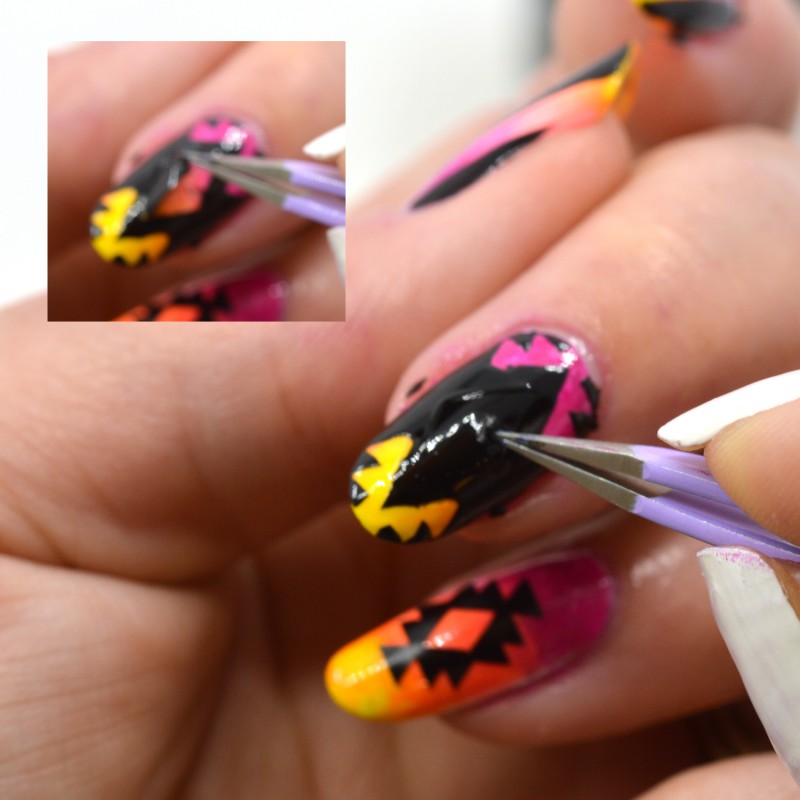
We will start with the pinky nail. Paint on a coat of Eclipse, a black cream. Use a polish that covers in one coat, as you do not want polish to dry before removing vinyl and do not have time for multiple coats.
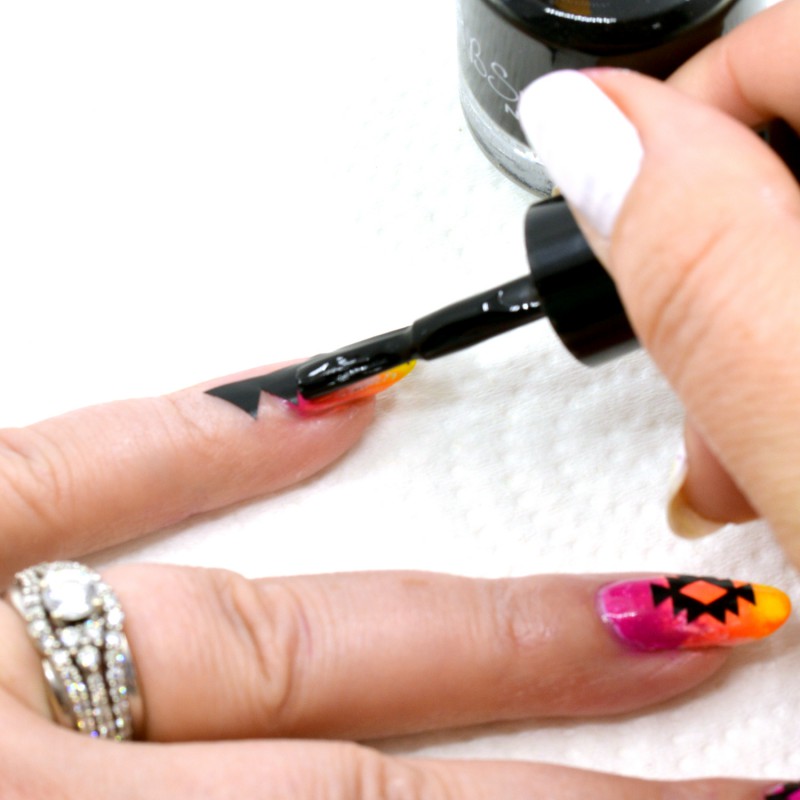
Here is the pinky nail covered with paint. Wait not more then 20-30 seconds before removing vinyl. If using a quick dry polish, remove right after you finish painting. Only paint one nail at a time, if you do more the polish may dry before all pieces are removed.
Using your tweezers, remove vinyl by pulling the free edge up that touches the skin or hangs off the end of the nail. Pull away from your nail in a steady motion.
Then, move onto the point finger nail and repeat process on that nail.

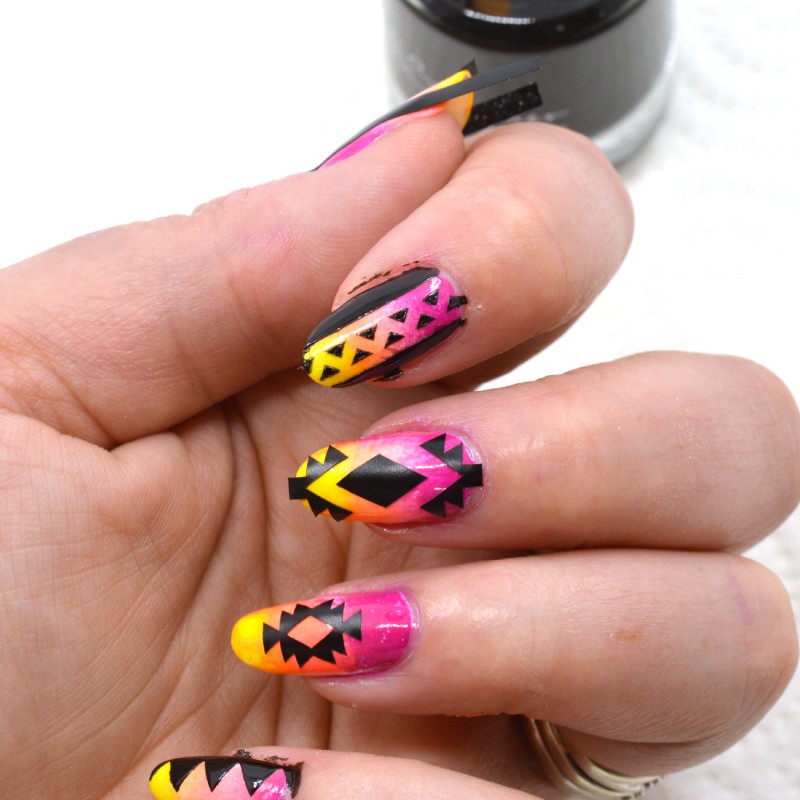
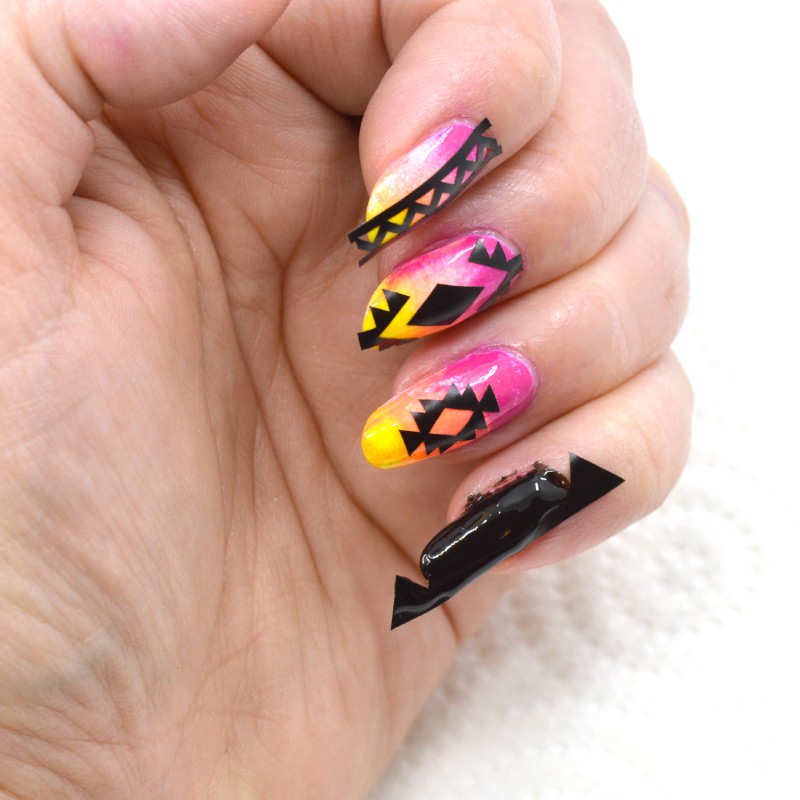
The thumb is next. The thumb has three pieces to remove.
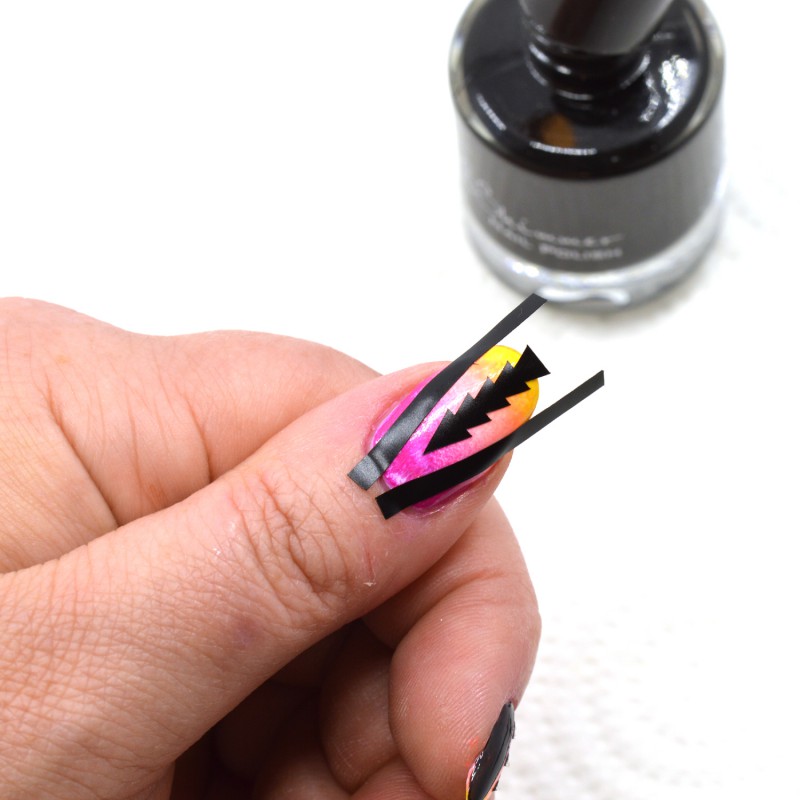


Next, we will move to the middle finger. This finger has two pieces that overlap for easy removal, and in the middle, the large diamond will also be removed. Since there are no areas of the diamond, we will use a different technique for removal.
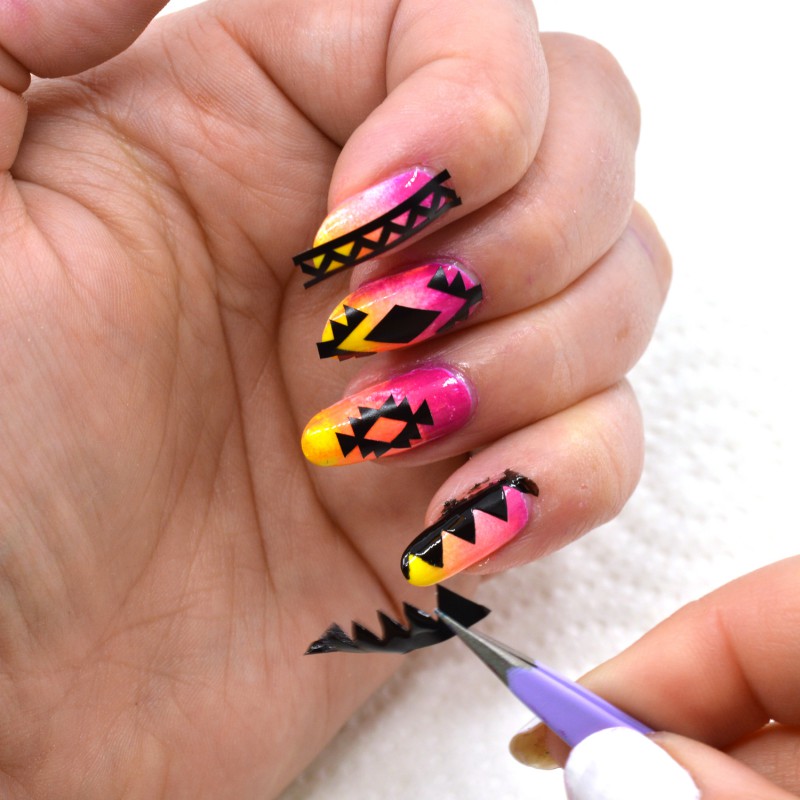
Paint the nail like the others. Quickly remove both the upper and lower stepped vinyl decals.

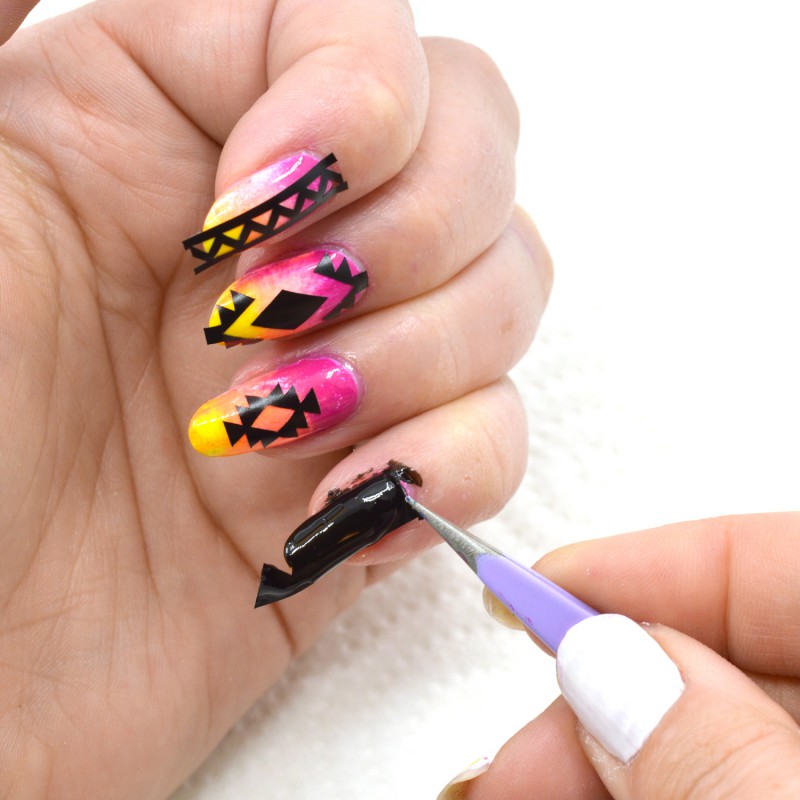
Using the pointy tip of the tweezers, carefully pierce the center of the diamond vinyl. “Hook” the tip of the tweezers, and pinch tips to help pull up the diamond piece. You can also use a safety pin. If you prefer, you can also try and catch the edge of the diamond and pull up to remove.
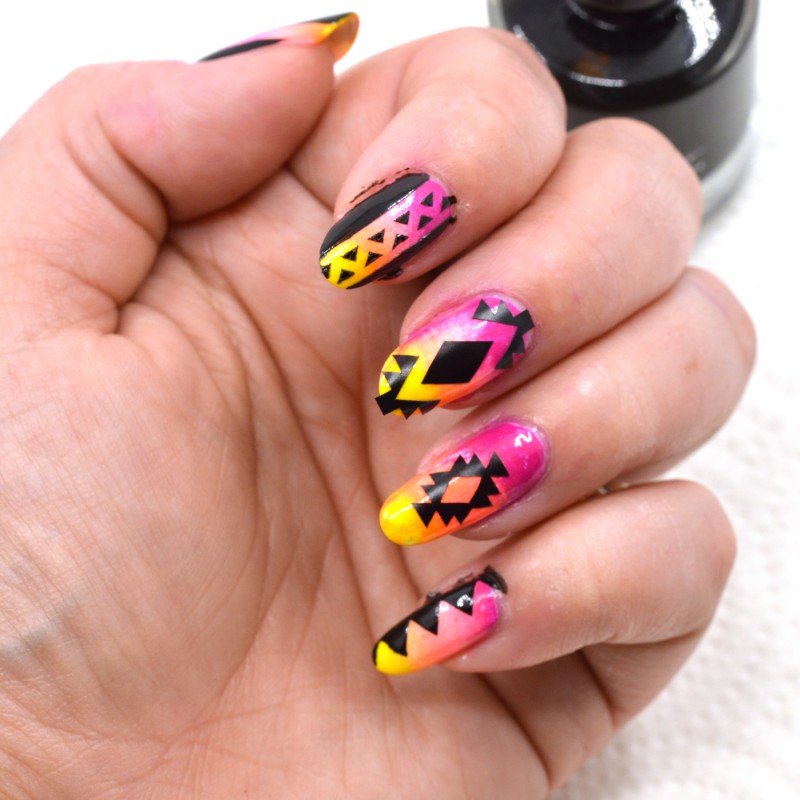
Here is it removed. At this point, the ring finger has a vinyl piece on that we will be leaving in place as a nail sticker. Clean up excess polish on cuticles as done previously with brush and acetone.
We can also use the bonus smaller diamonds and triangles as accent pieces. For the middle finger, we will be using a smaller diamond from inside the ring finger piece.
Center in the blank diamond area and place on the nail with the tweezers. Press down firmly.
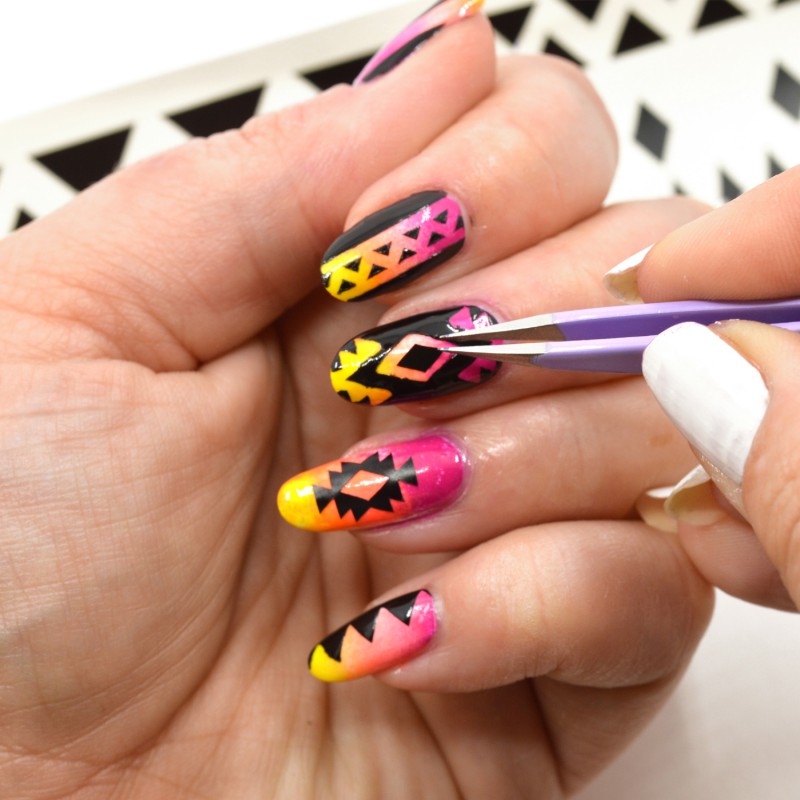
From the pointer finger vinyl decal pattern, we can pull tiny triangles to use as accents on the pink nail.
Place on the pinky in desired positions.
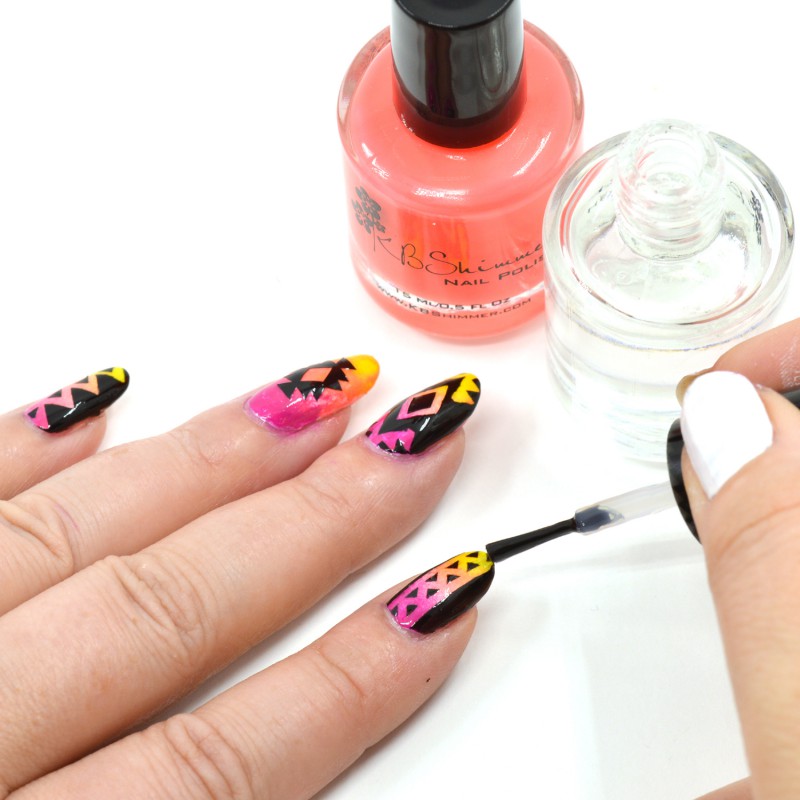
When last decals are placed, ensure all pieces are stuck to the nail by pressing firmly and follow with 1-2 coats of Clearly On Top to add shine and a protective finish to the nails. It is perfectly fine to use top coat over the vinyl decals to seal in place. Nail Vinyl decals are not reusable.
There you go! A fun, summery tribal look made easy with vinyl decals.