Monthly Archives: June 2014

How To Use KBShimmer Nail Vinyl Decals

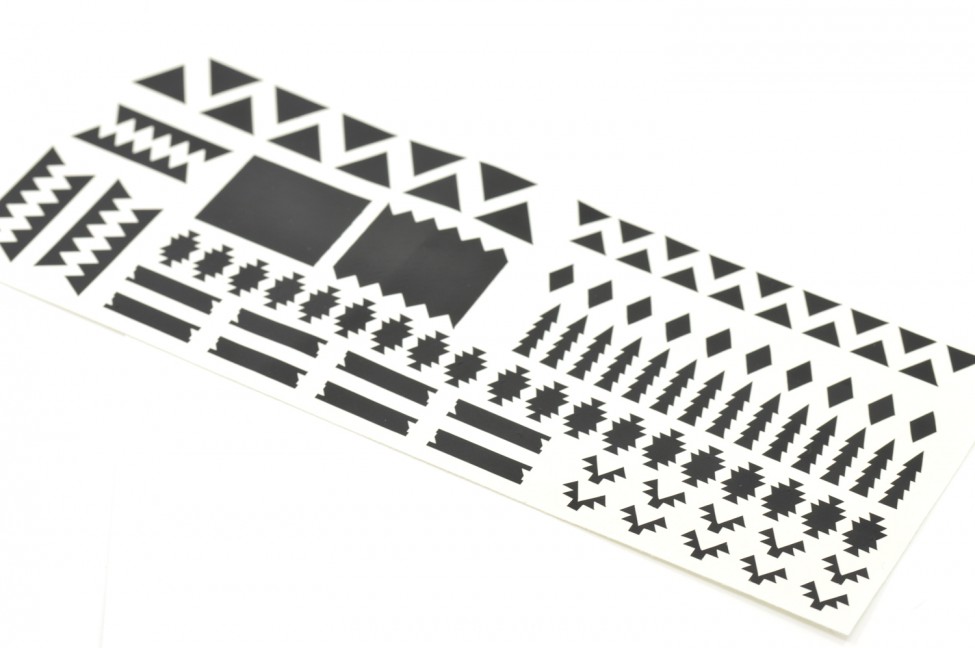
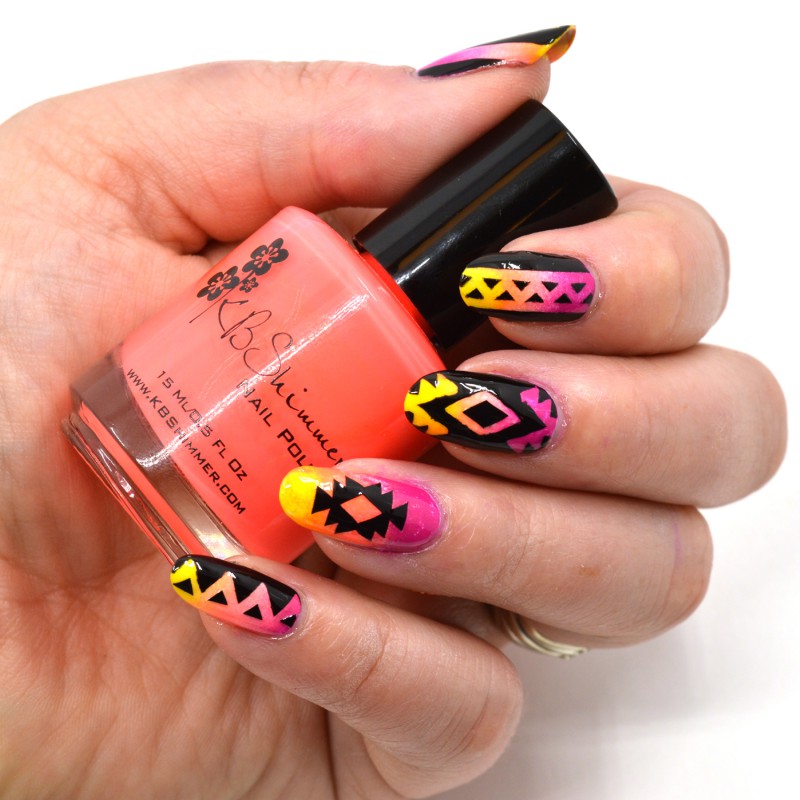
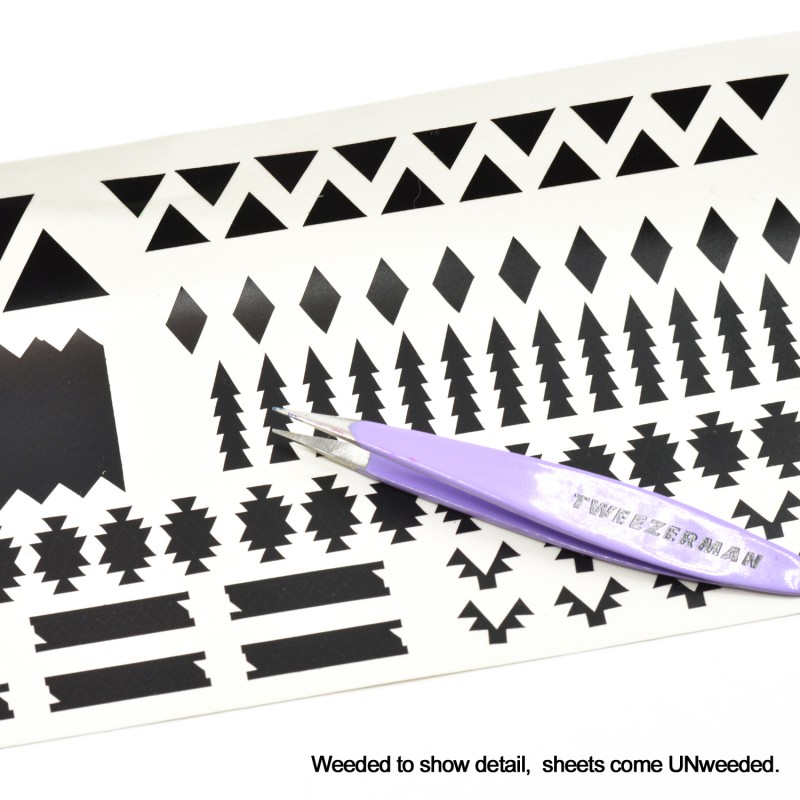
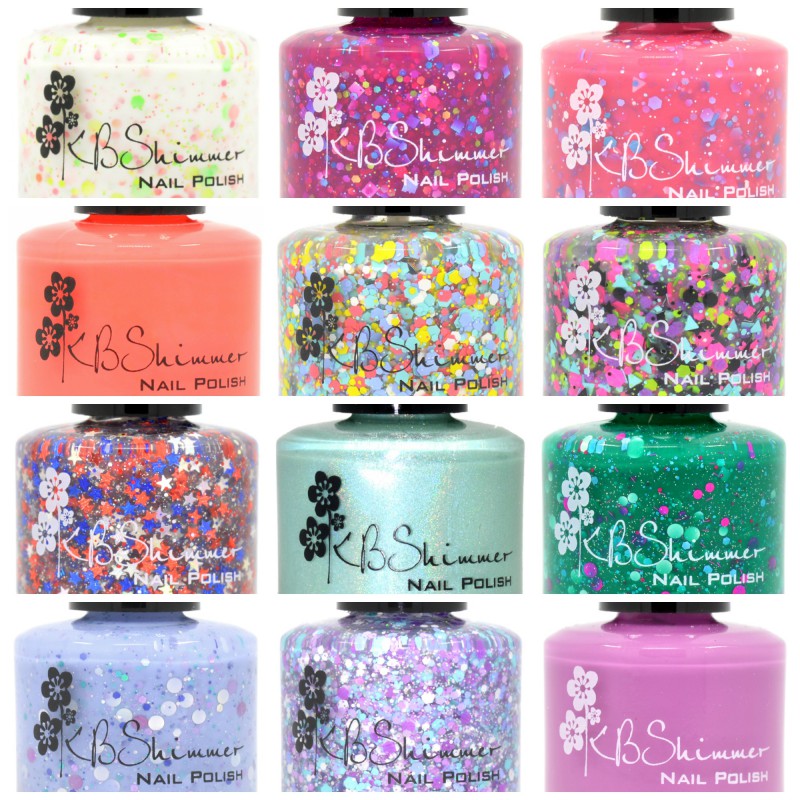
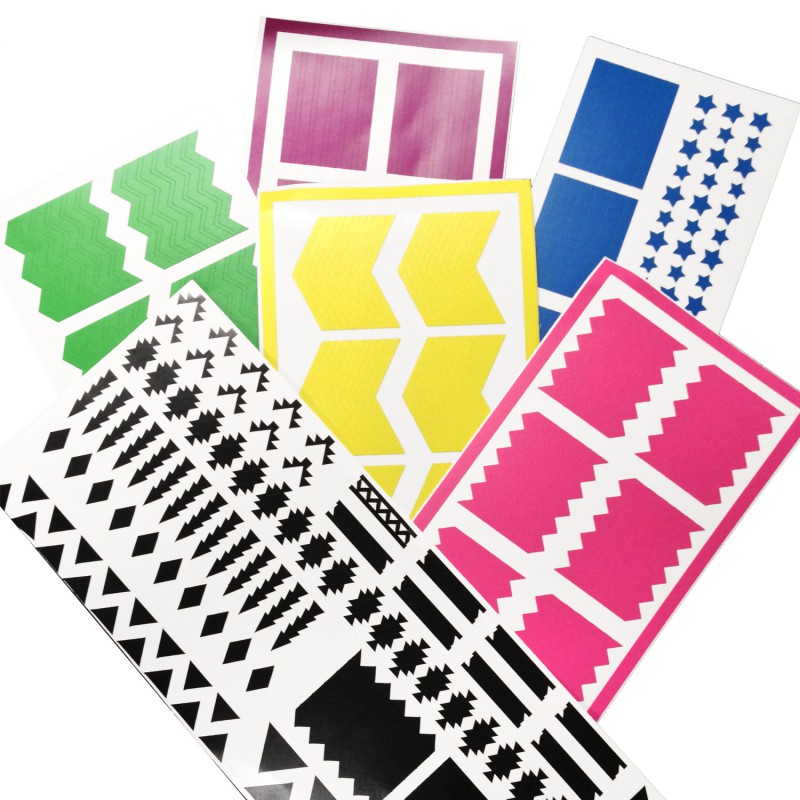
We are so excited to now be offering our vinyl nail decal sheets in 6 different patterns (set for launch 06/20/14).  These are a new product for a lot of people, so we have a step-by-step tutorial below showing how to use the vinyl pieces as a peel off stencil.  To see how we use them as a leave on sticker, see our Tribal Nail Art post.


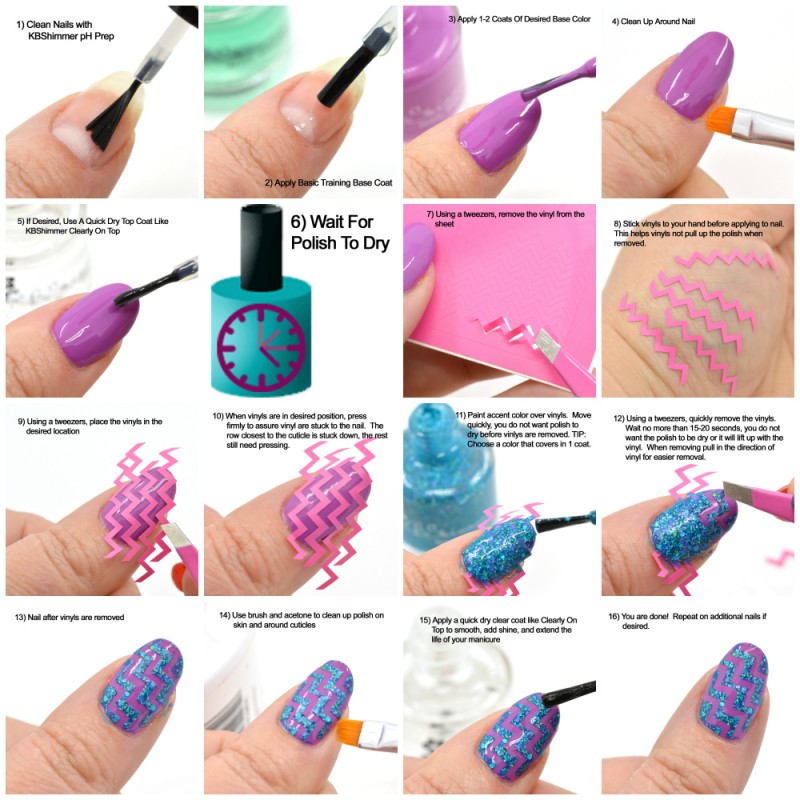
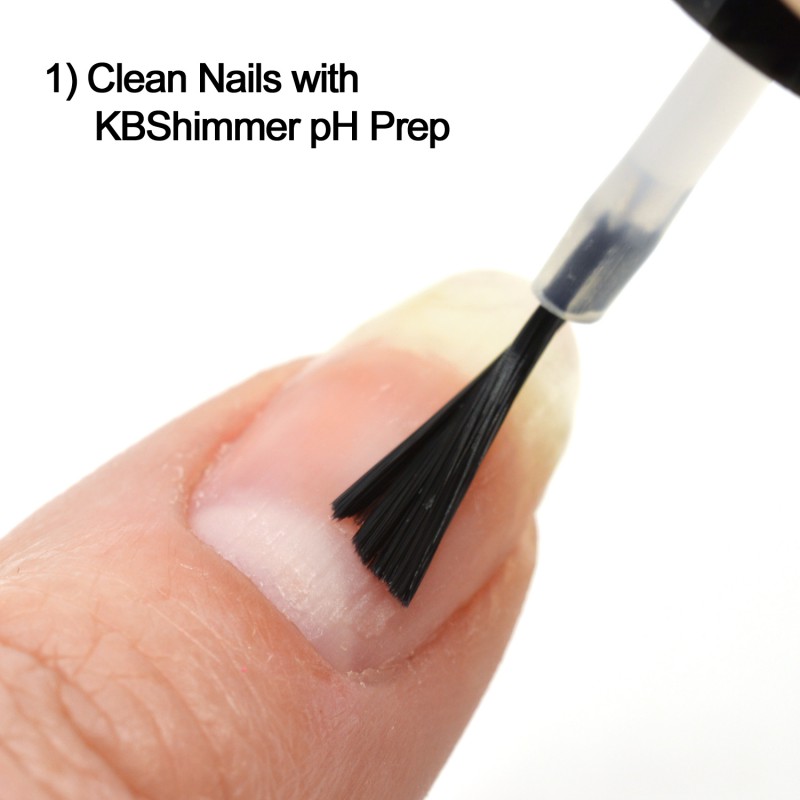
For a long lasting manicure, start with clean nails.  Use KBShimmer pH Prep to clean and prep nails for base coat.

DecalTutorialStep1

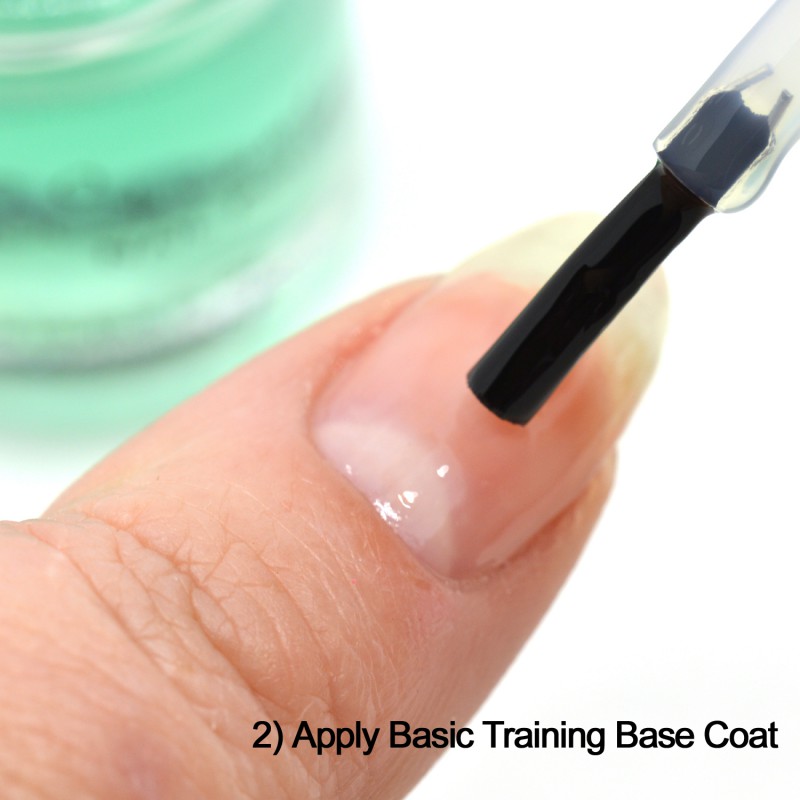
Follow by applying a base coat like Basic Training.  Let dry before moving on to next step.  Completely dry polish is key when using vinyl decals.

DecalTutorialStep2

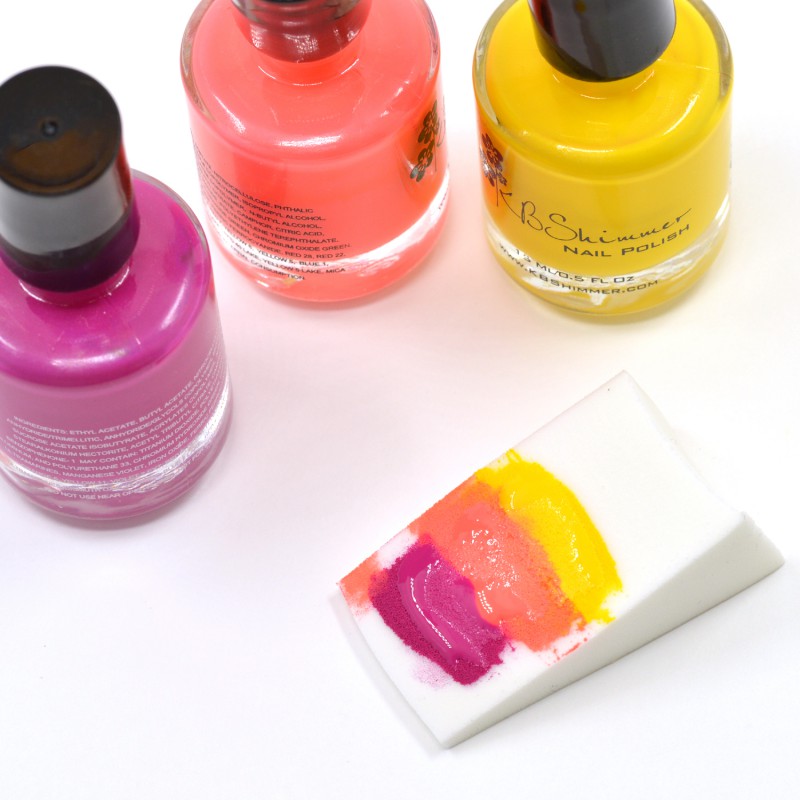
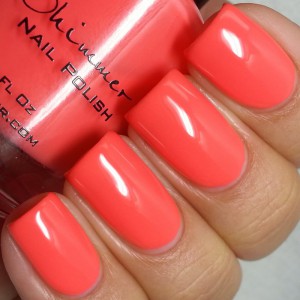
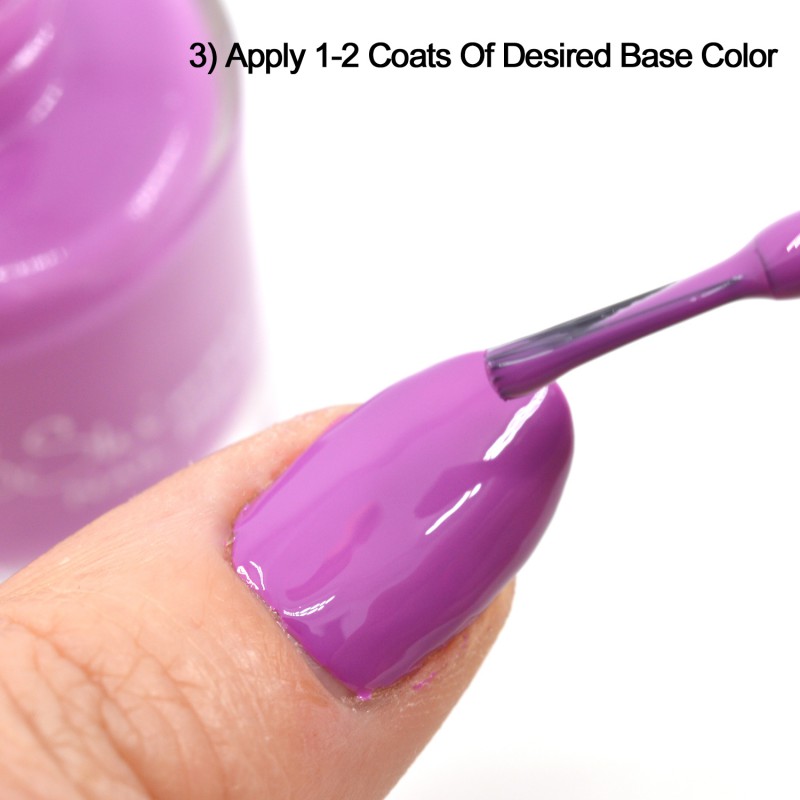
Use a polish that applies in 1-2 coats.  You want polish to be dry, and too many coats will risk the bottom layers not being dry enough.  I am using Radiant Orchid for my bottom color.

DecalTutorialStep3

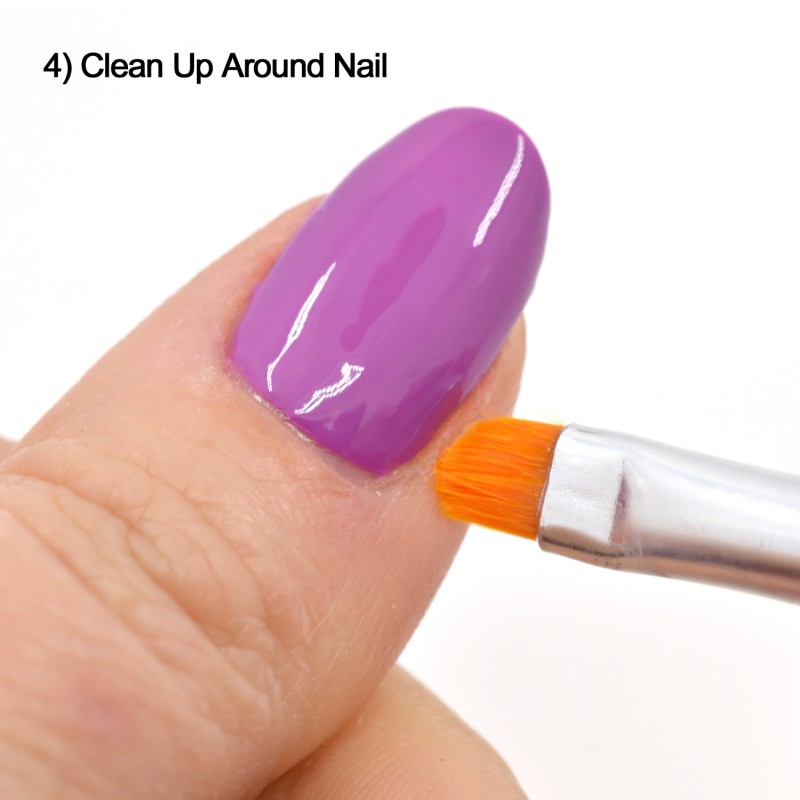
Cleaning up now will make final clean up much easier.

DecalTutorialStep4

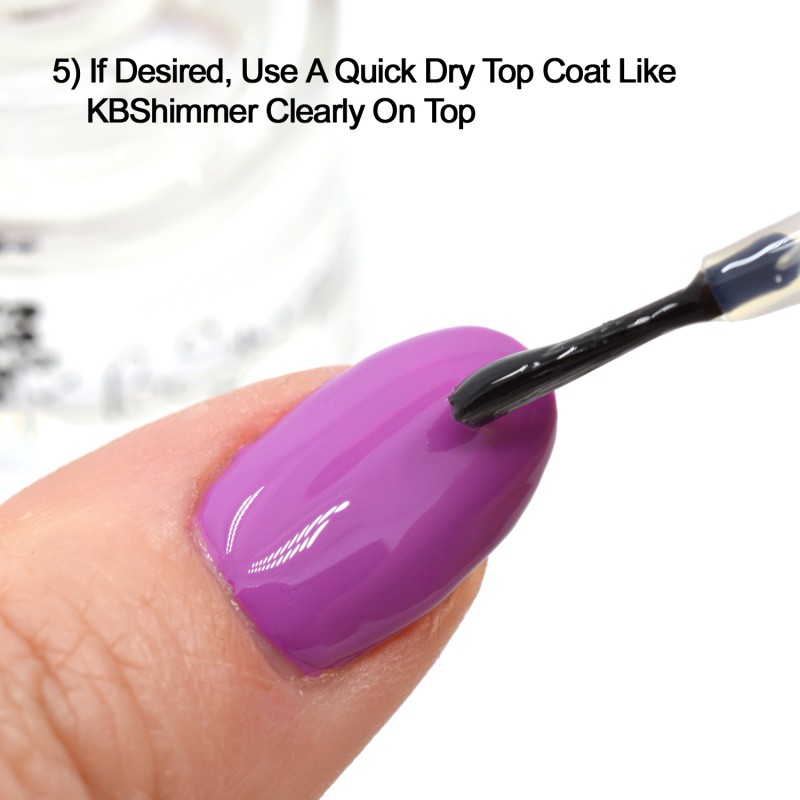
I strongly suggest that you use a quick dry top coat like Clearly On Top to ensure your nails are dry before the next step.  Using a quick dry top coat will also make cleaning up any mistakes easier.

DecalTutorialStep5

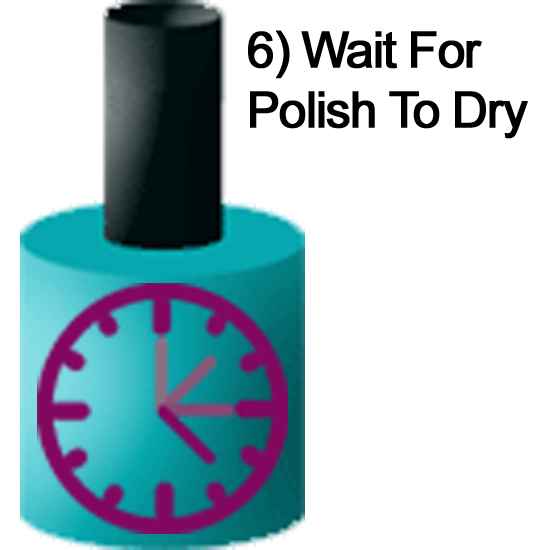
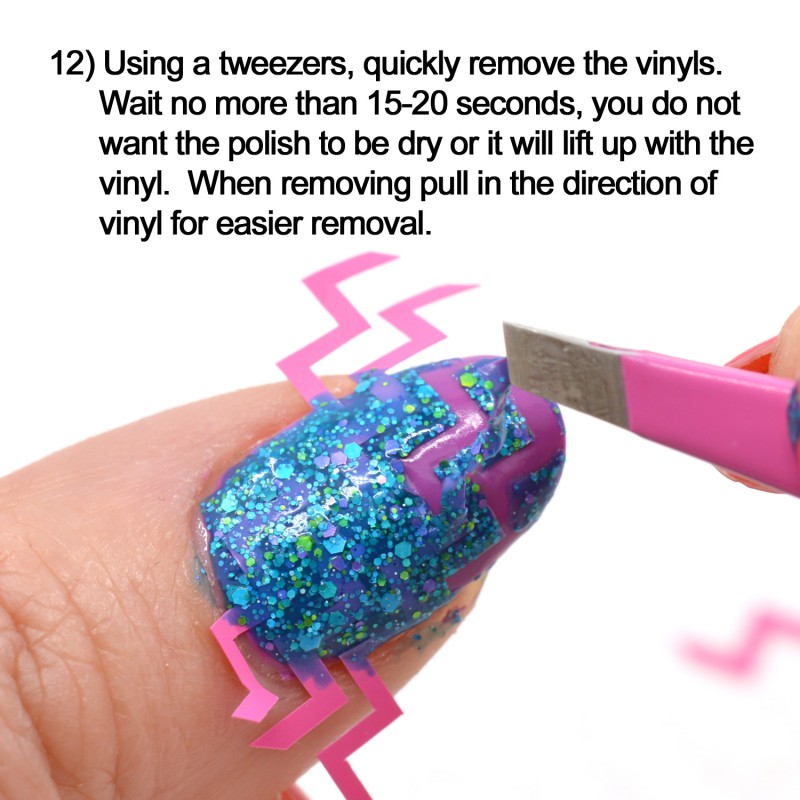
Again, making sure the polish is dry is key for a good turn out.  Wet polish will pull up with the vinyl.

DecalTutorialStep6

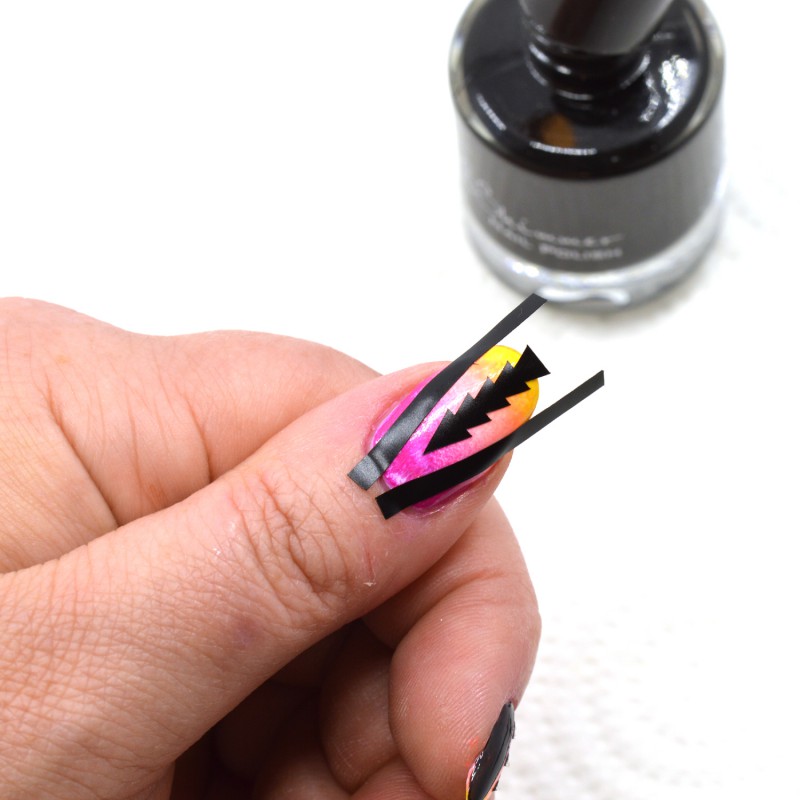
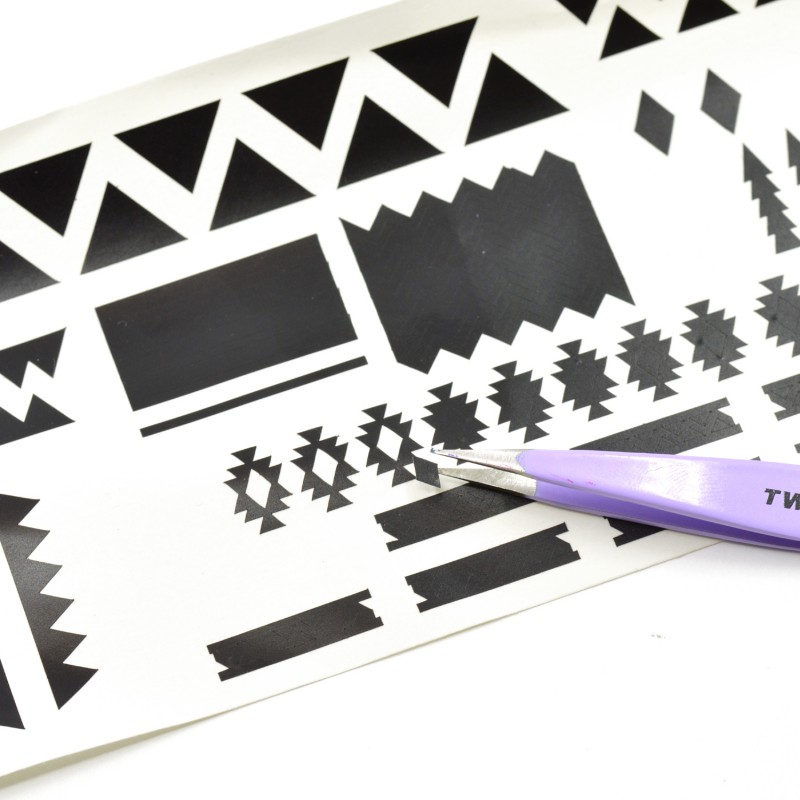
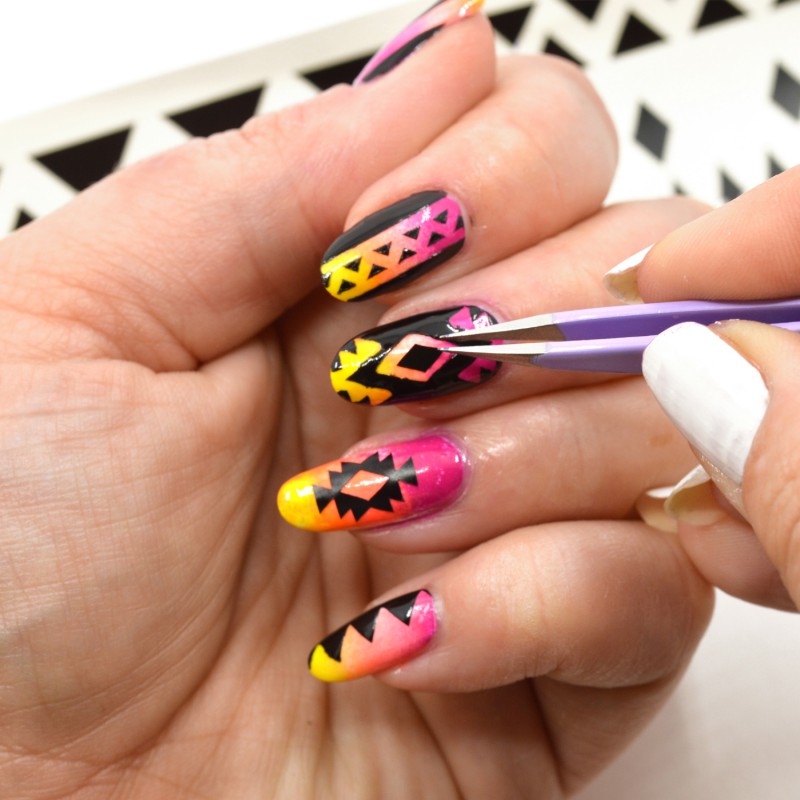
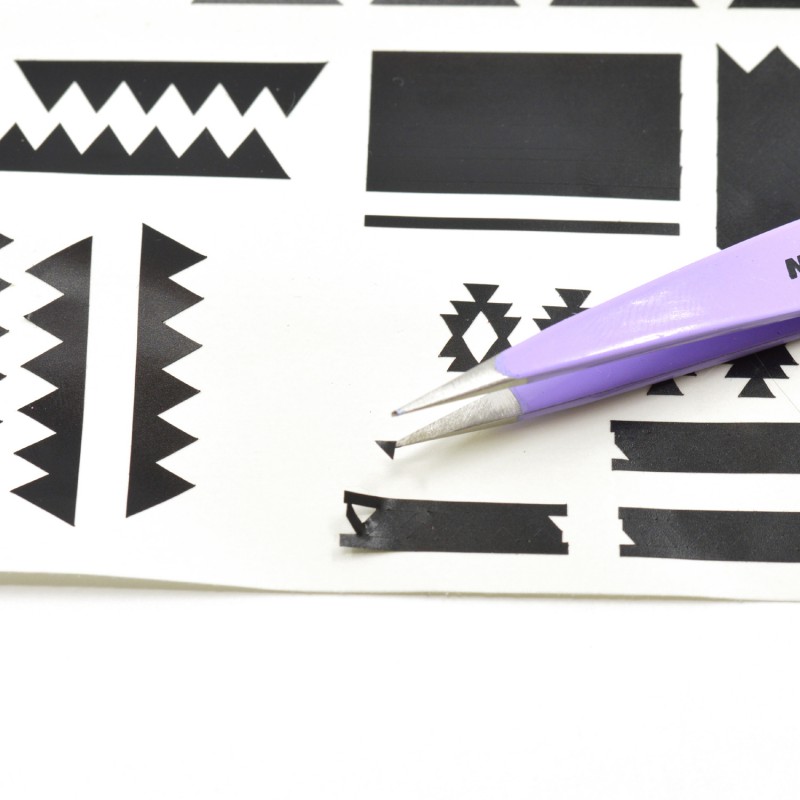
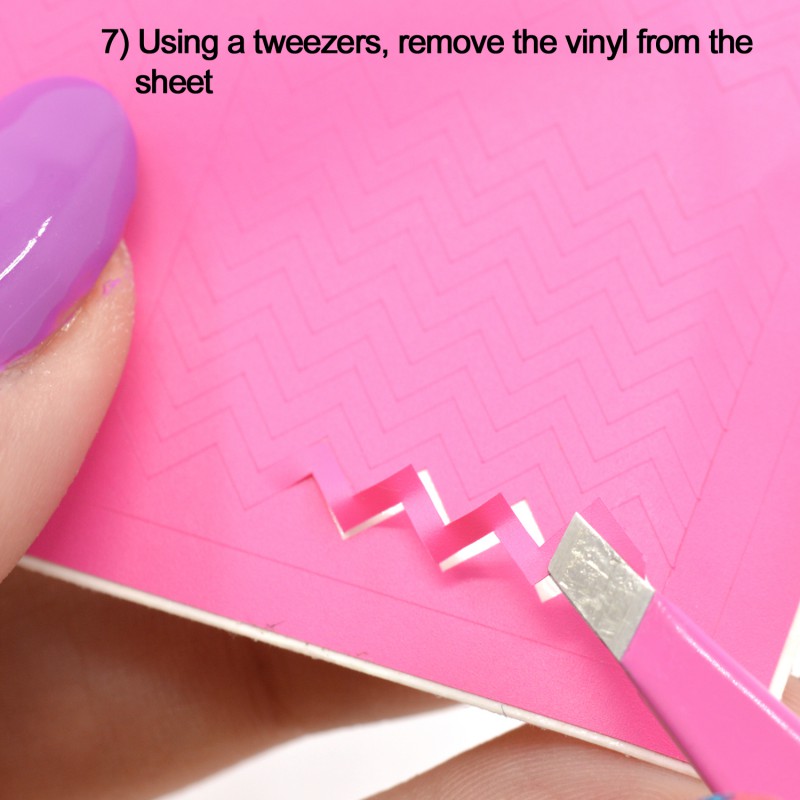
I find using a tweezers to remove the vinyl from the sheet works best for me, preserving the manicure on my other nails!  Here we are using our Zig Zag Nail Vinyl Decals.

DecalTutorialStep7

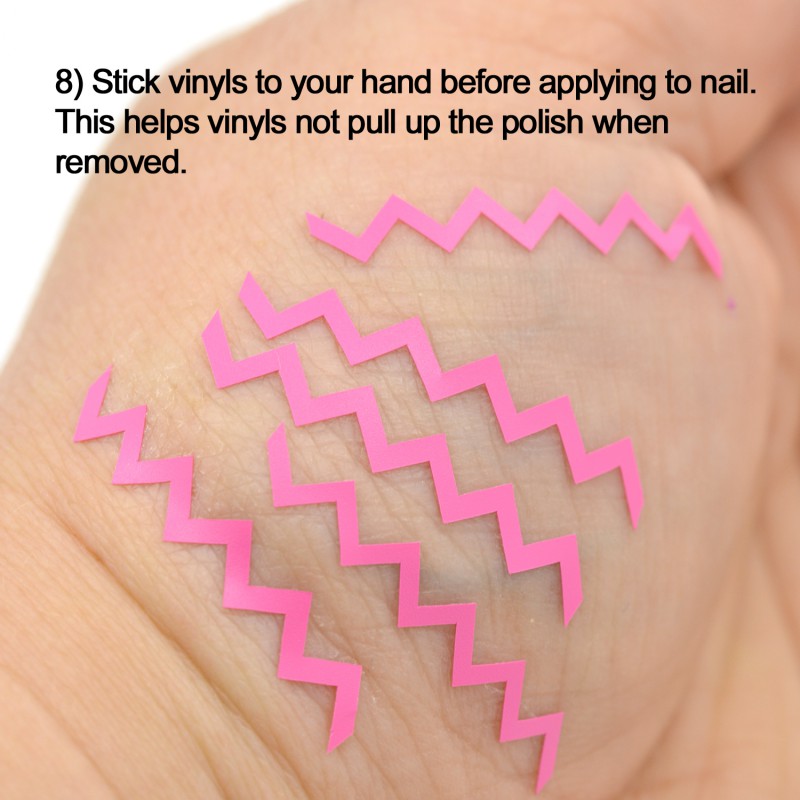
Stick the vinyl to your hand to help remove some of the stick.  If they are too sticky, they can be difficult to remove, or can pull up polish.

DecalTutorialStep8

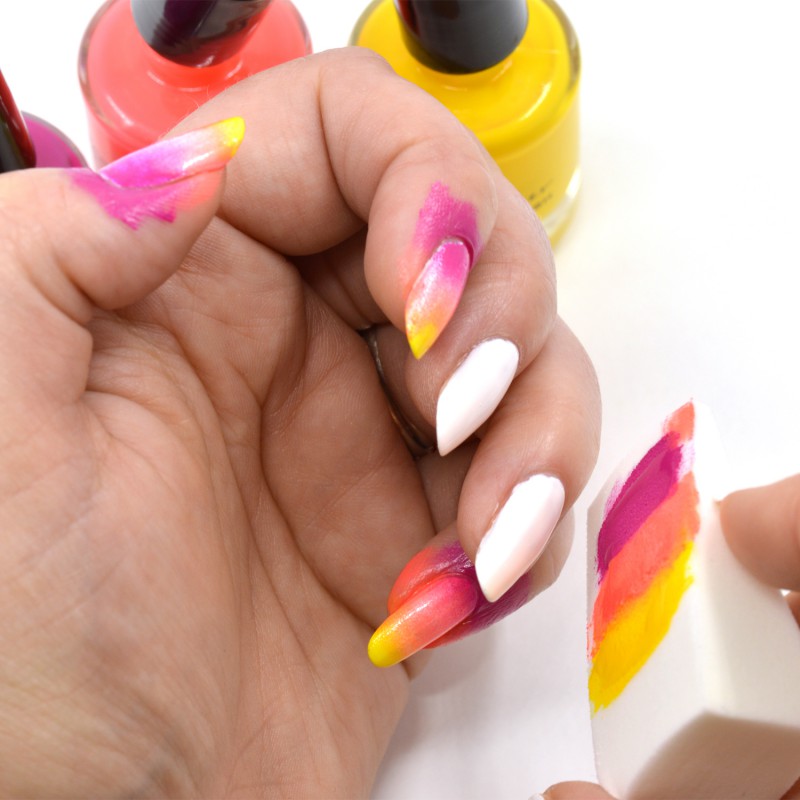
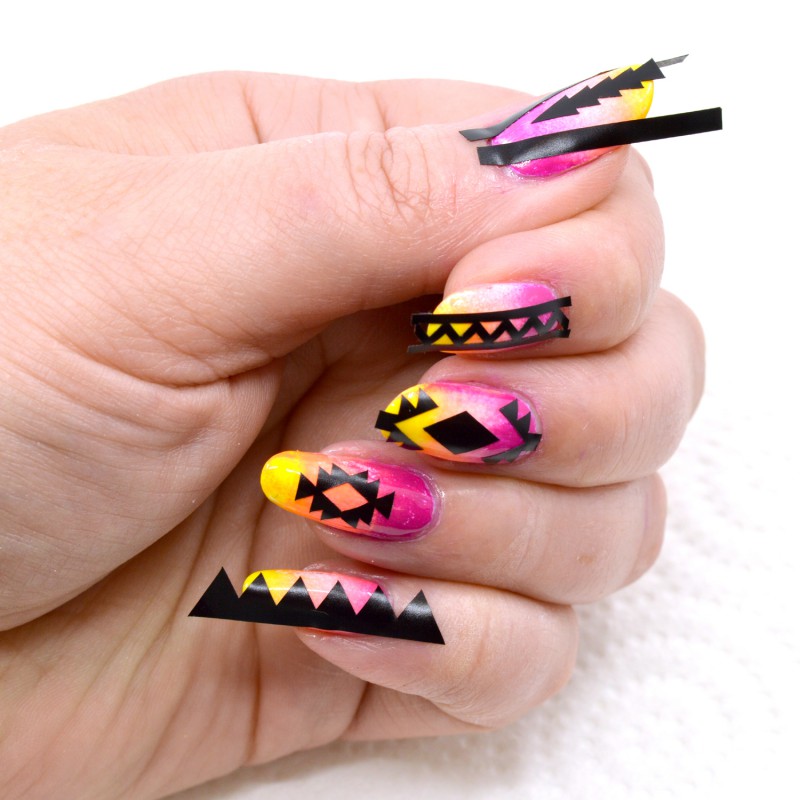
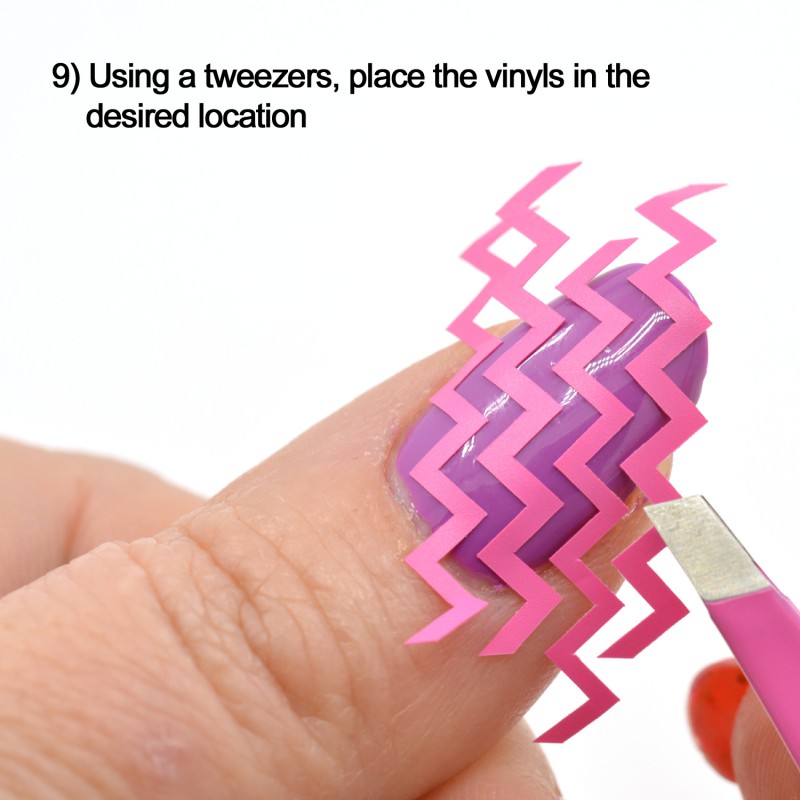
Using a tweezers helps me place the vinyl pieces, but you can use your fingers.  There are so many ways and design possibilities with these, but I have chosen to line them up for a repeating zig zag pattern.

DecalTutorialStep9

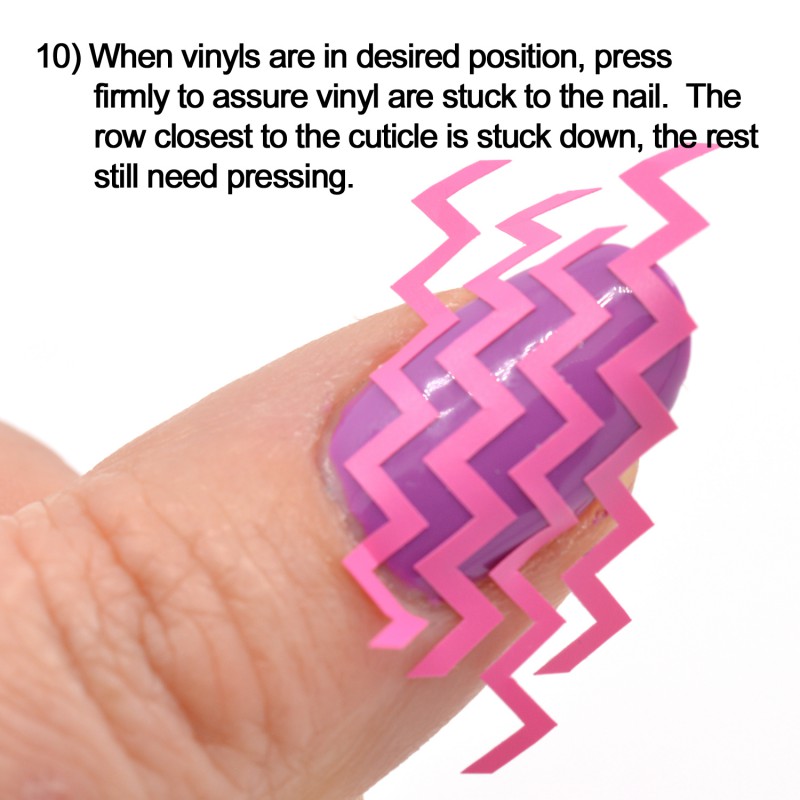
Press the vinyl pieces firmly.  Doing so will help polish not seep under the vinyl, leaving you with crisp lines.

DecalTutorialStep10

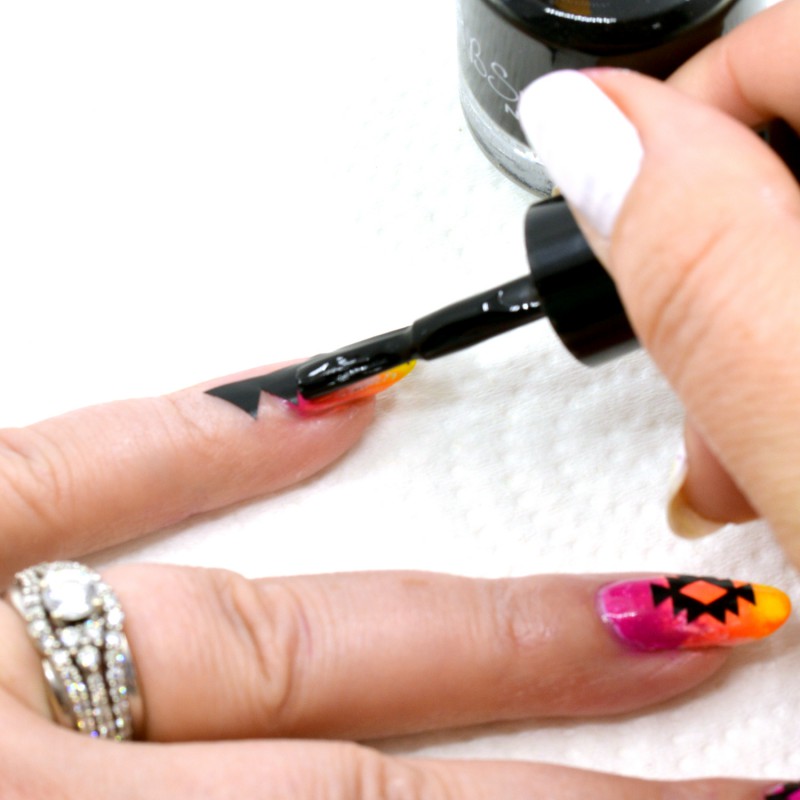
Now is the fun part.  Cover the vinyls with 1 coat of your accent color.  I love textures, holographic colors, polishes that cover well in one coat and have visual interest.  For this tutorial, I am using She Twerks Out.  If you want your color only in certain areas, or want different colors between the stripes, use the brush carefully apply polish between the vinyl pieces.  Since I am wanting the same color over the whole nail, I don’t worry about “coloring” between the lines.

DecalTutorialStep11

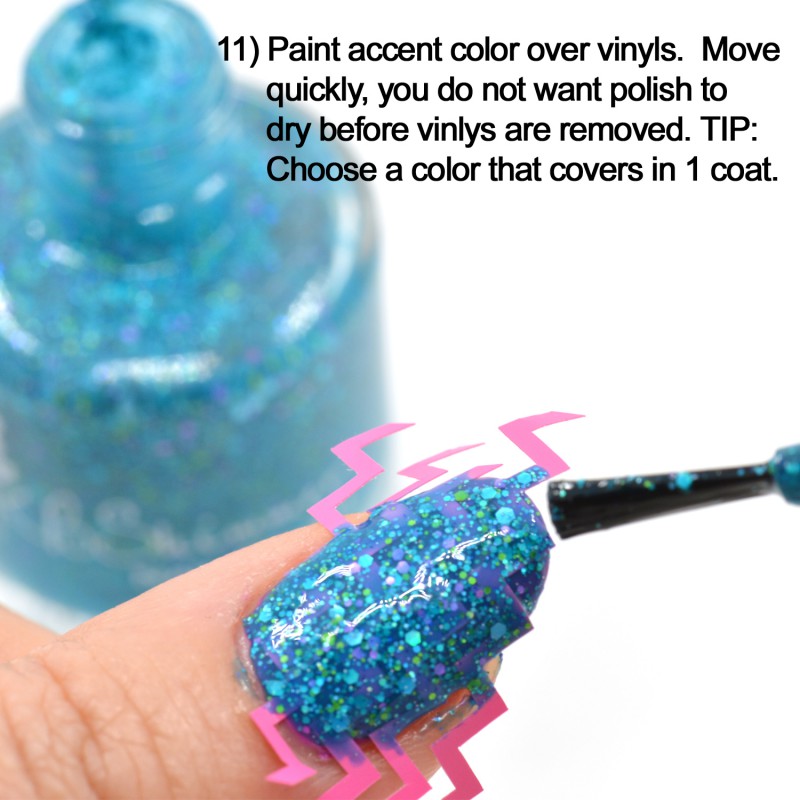
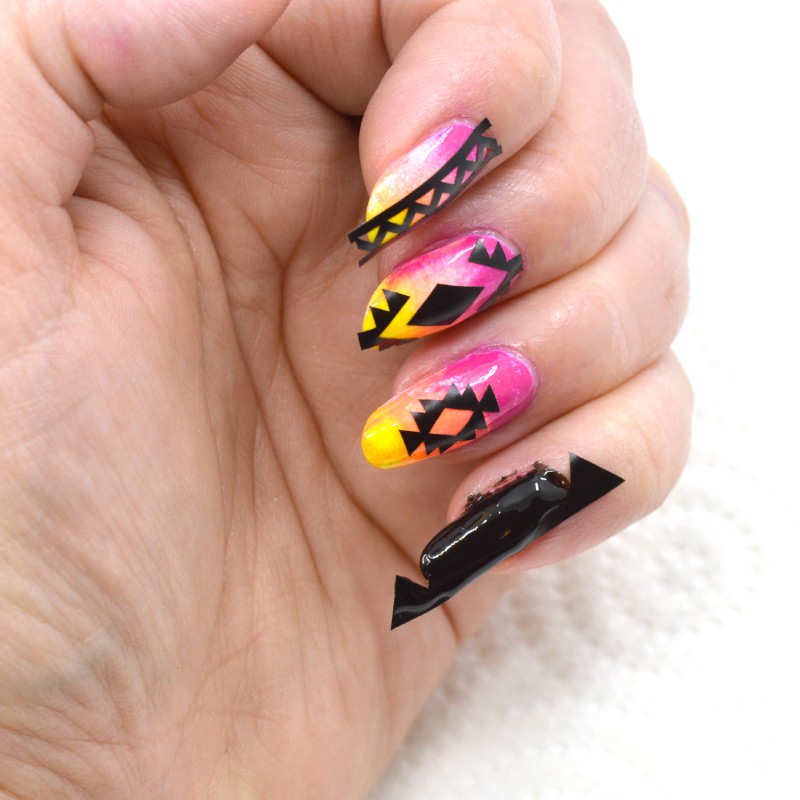
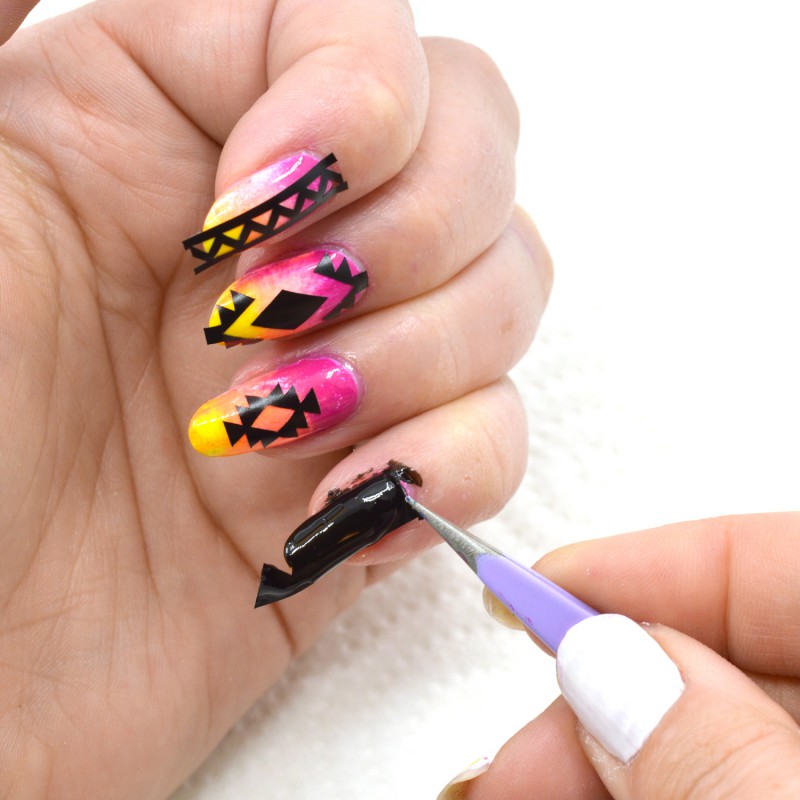
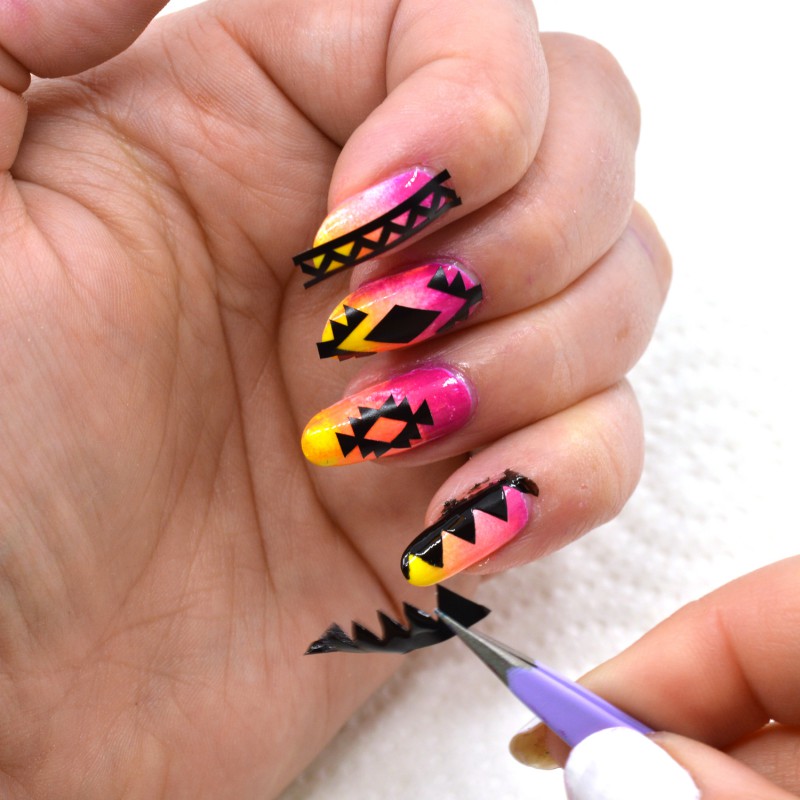
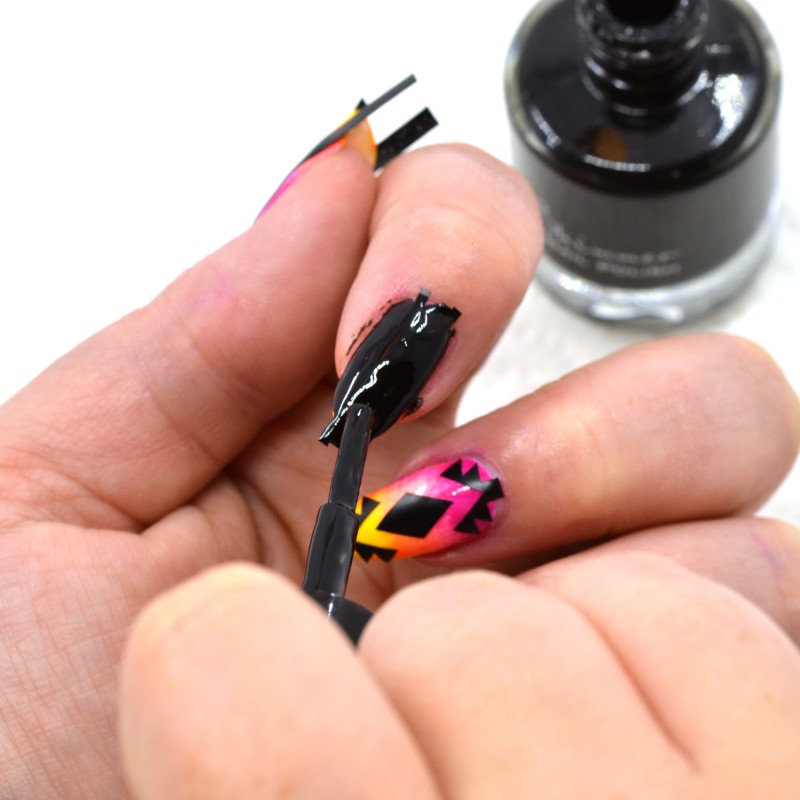
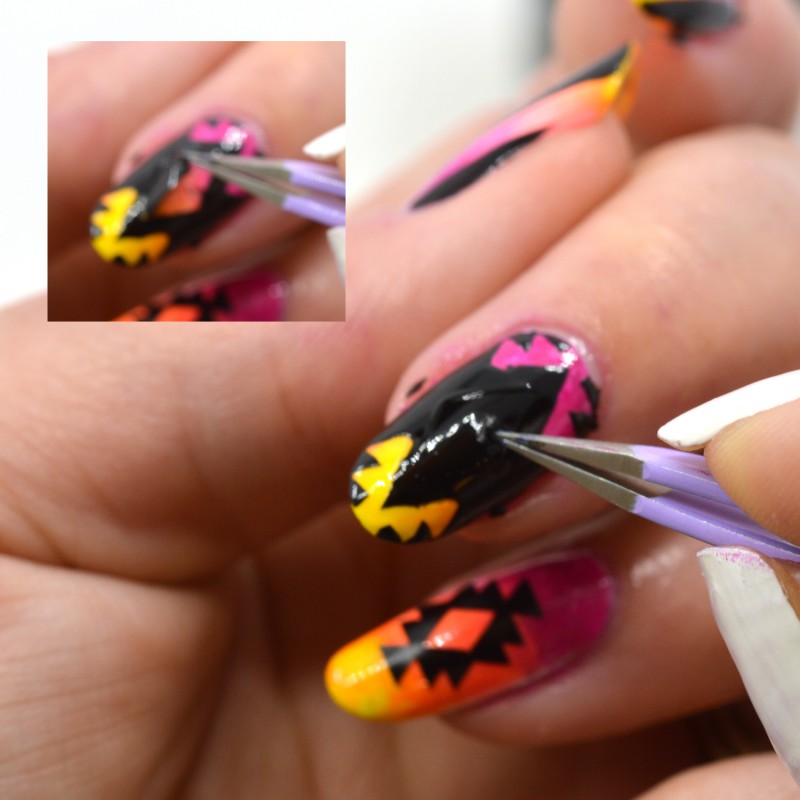
Once your coat of polish is on, you want to start removing the vinyl pieces as soon as possible.  If you wait too long, you risk pulling up the accent polish you just applied along with the vinyl pieces.  Only paint the accent color one nail at a time to prevent the polish drying before you can get the vinyl removed.

DecalTutorialStep12

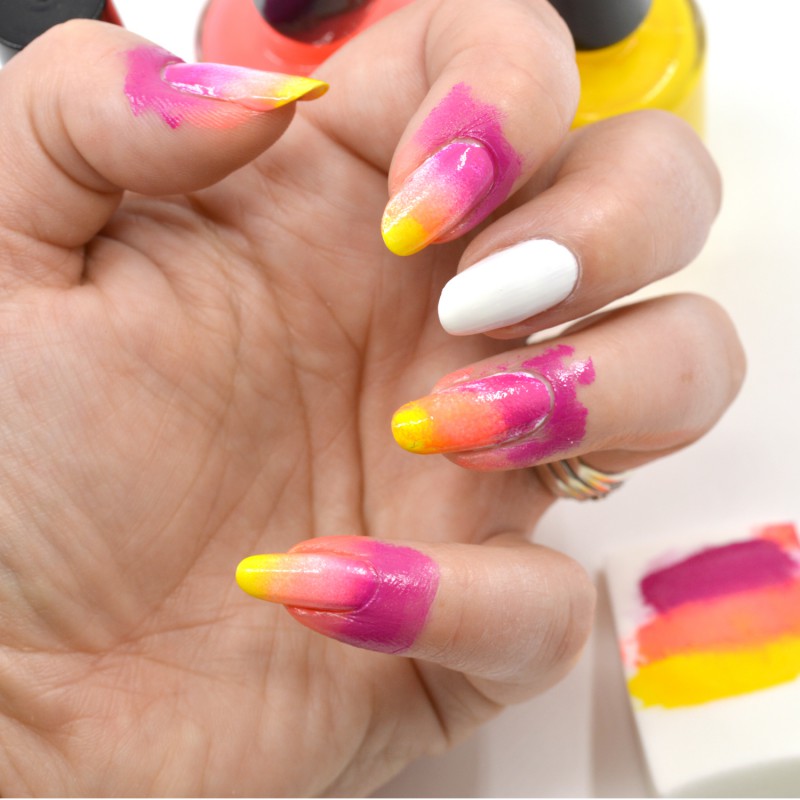
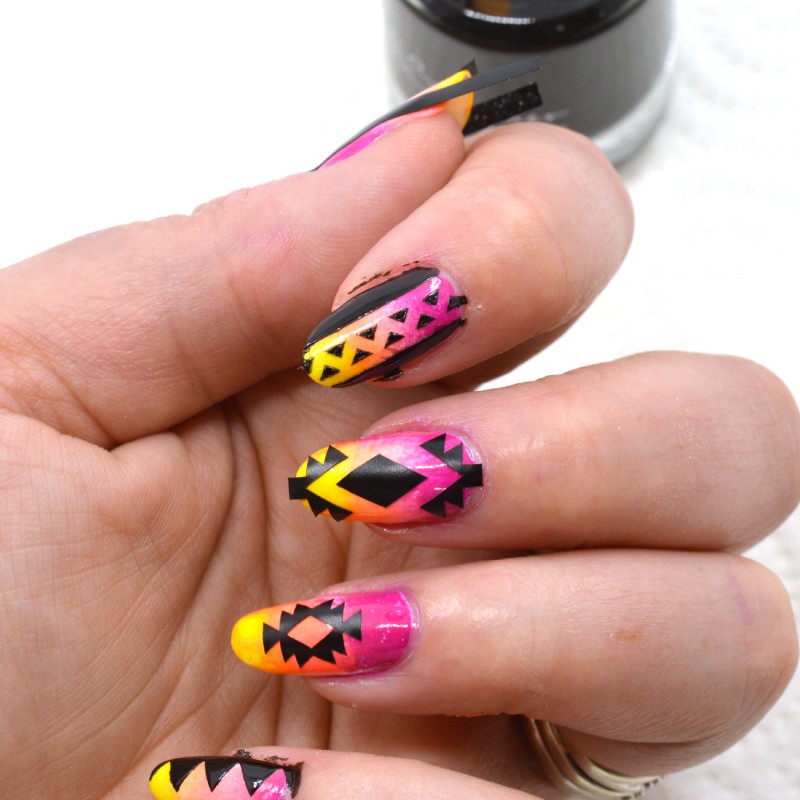
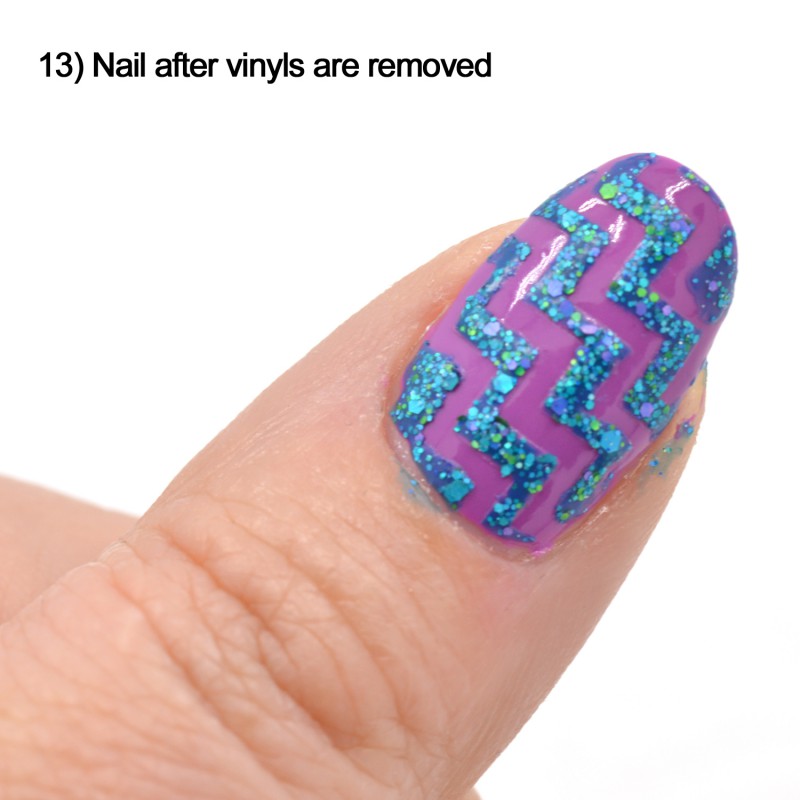
Here is the nail after vinyl decals are removed.

DecalTutorialStep13

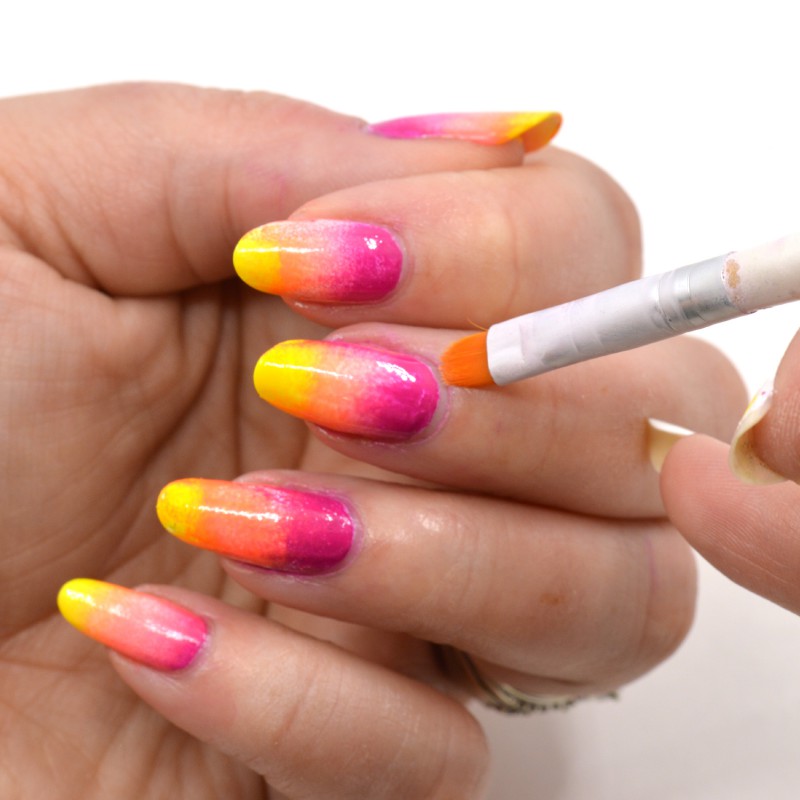
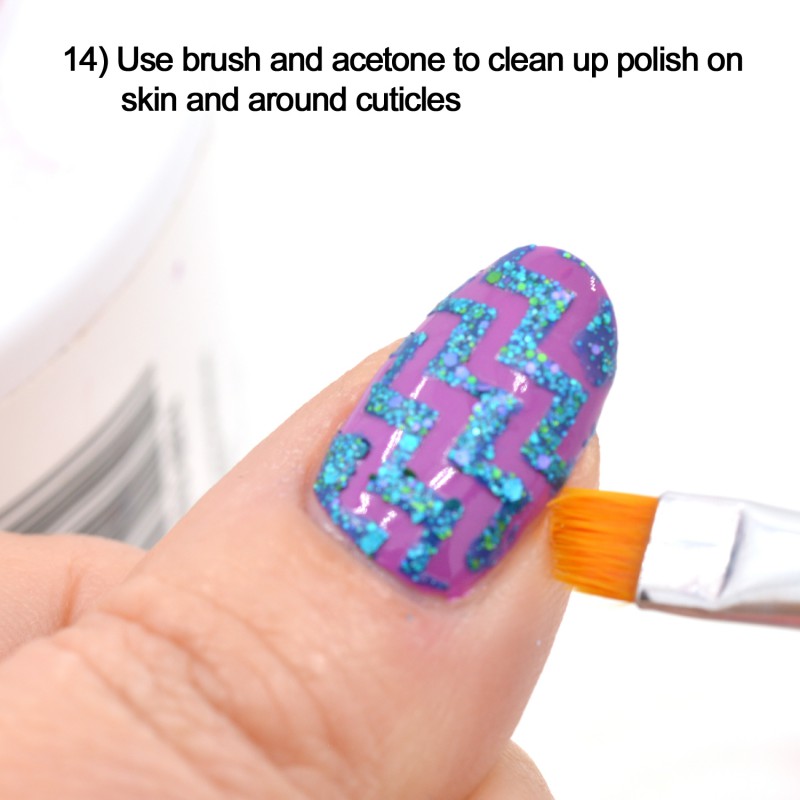
Clean up any polish you got on the skin and cuticle area.  If you used a quick dry clear coat before applying vinyl pieces, you can also use the clean up brush dipped in acetone to clean up any polish that may have bled under the vinyl.  Lightly dab polish you want to remove with the brush.  Repeat if needed, keeping brush damp, but not dripping wet with acetone.

DecalTutorialStep14

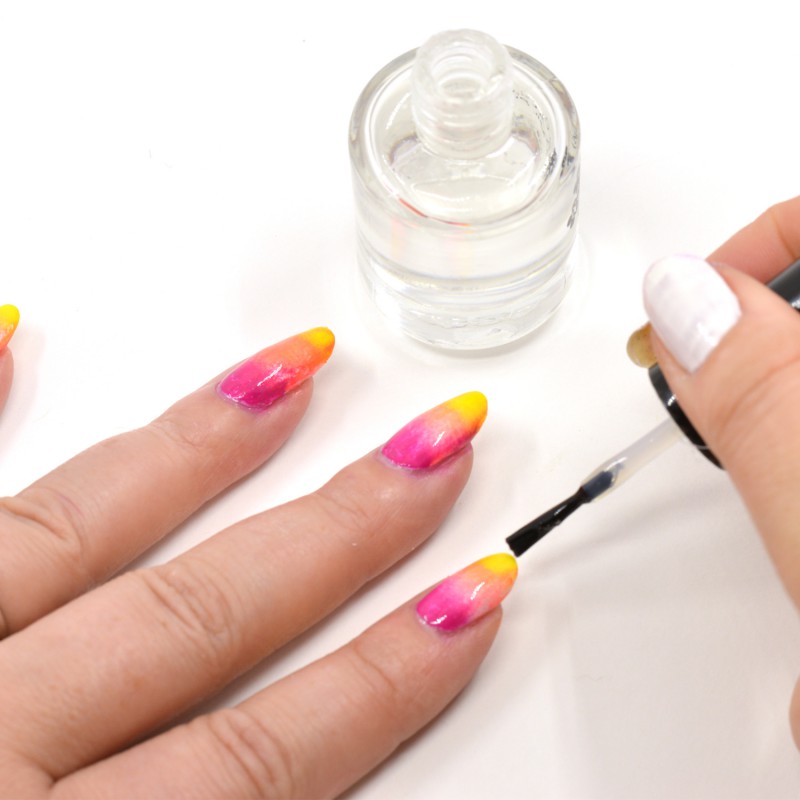
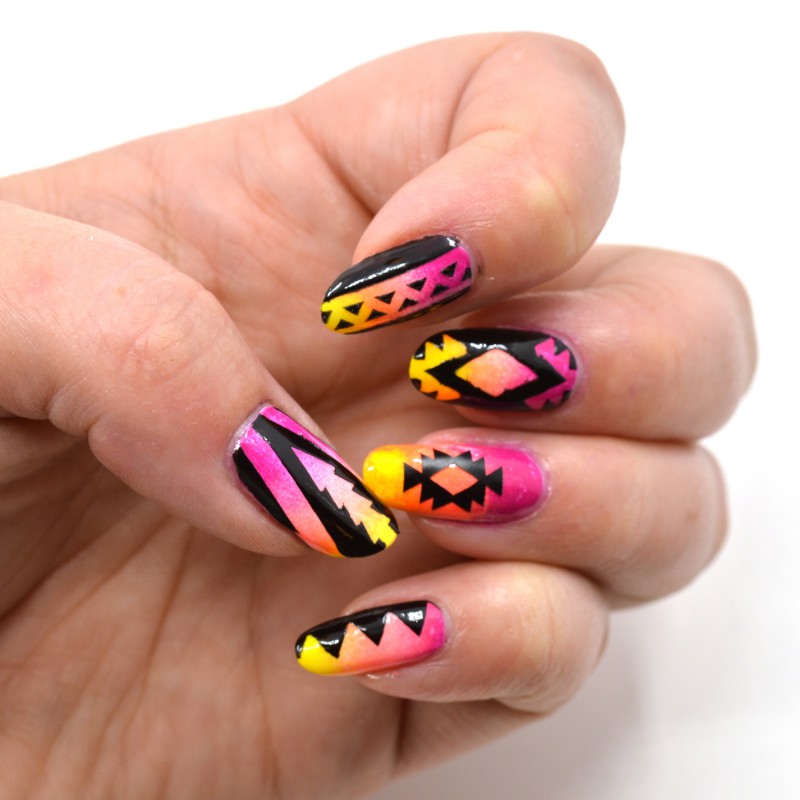
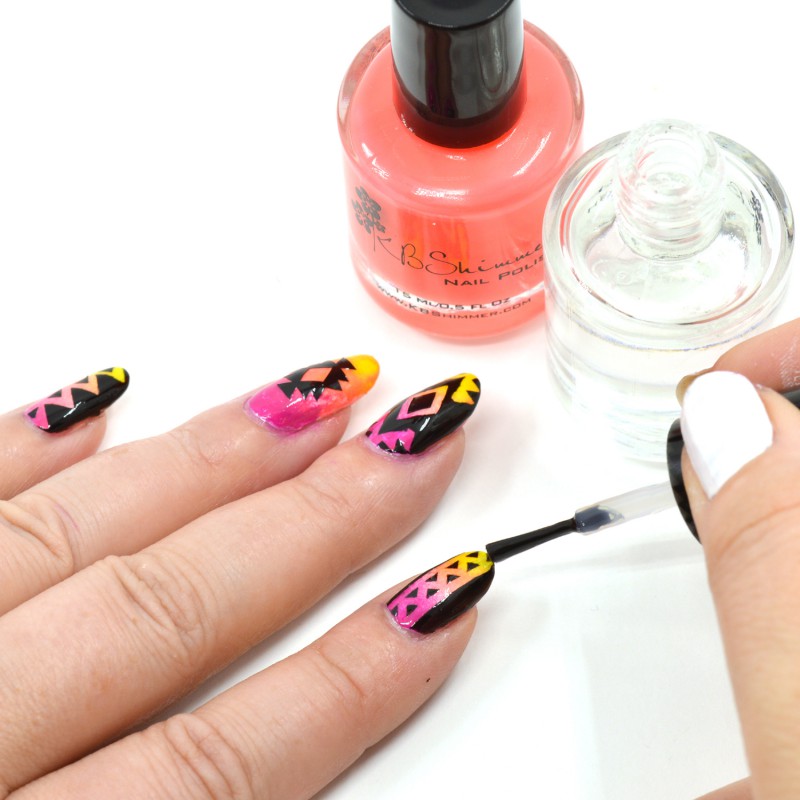
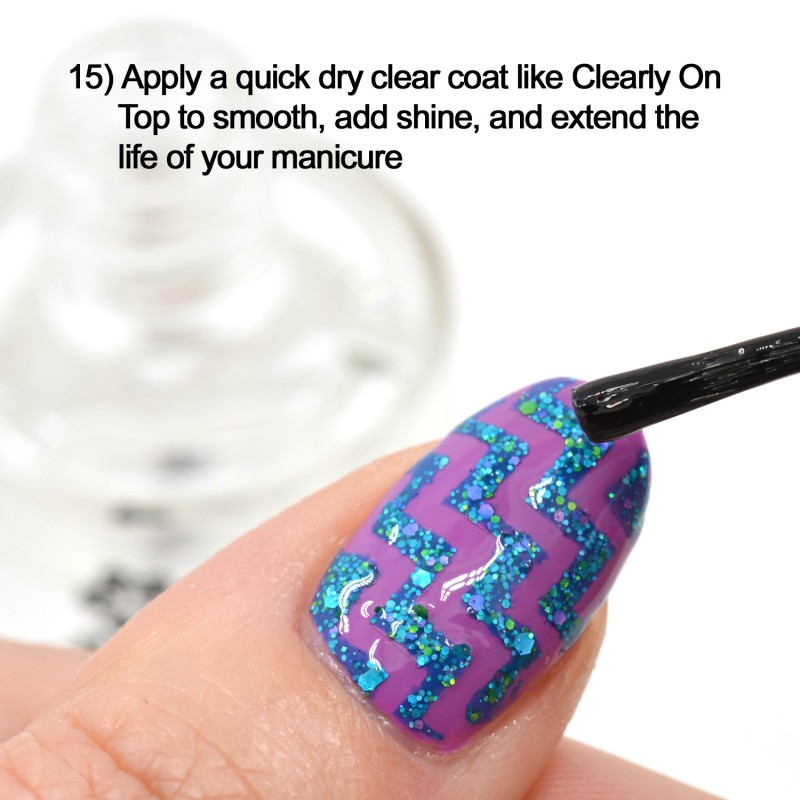
I now follow-up with Clearly On Top to smooth out the manicure, add shine and protect the nails.  Make sure to apply top coat to the very tip of the nail to reduce chips.

DecalTutorialStep15

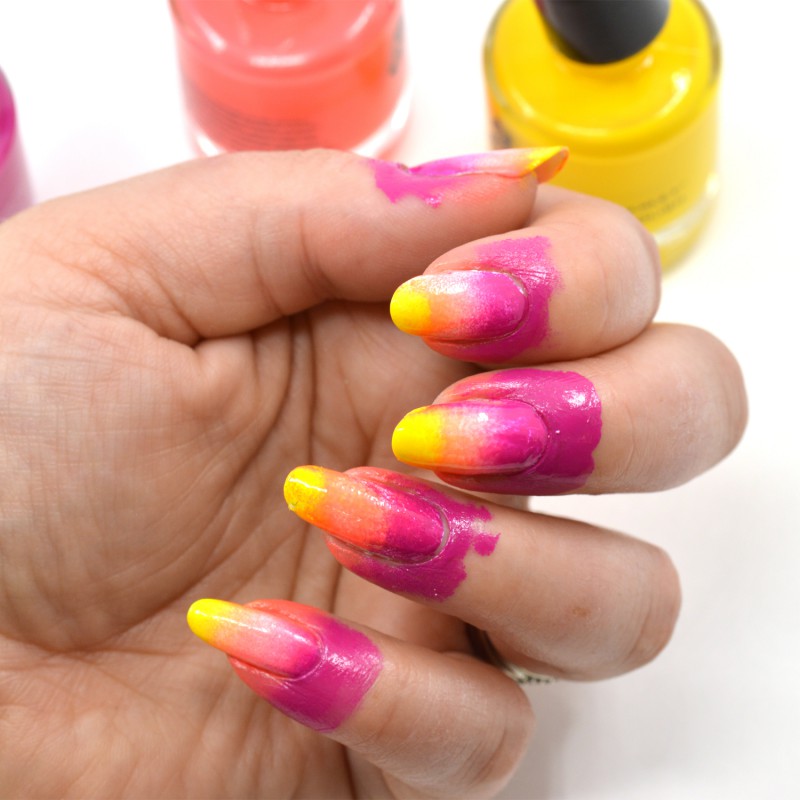
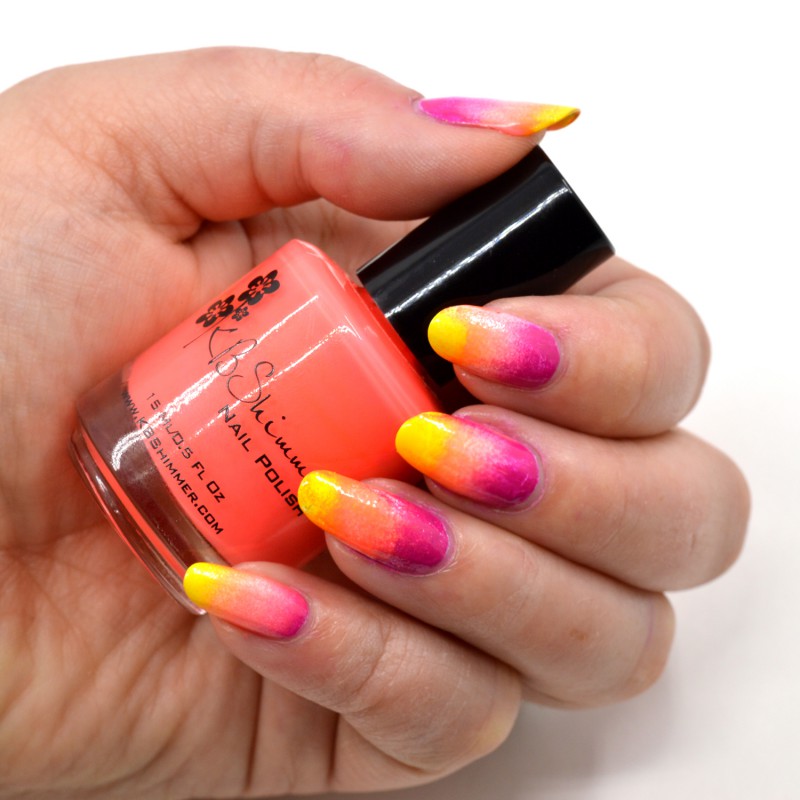
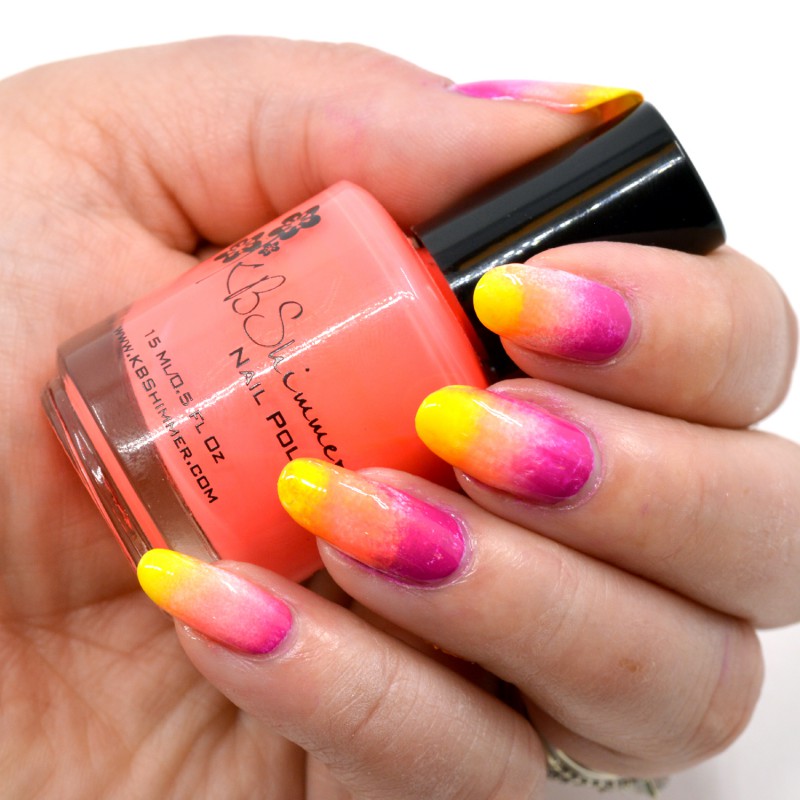
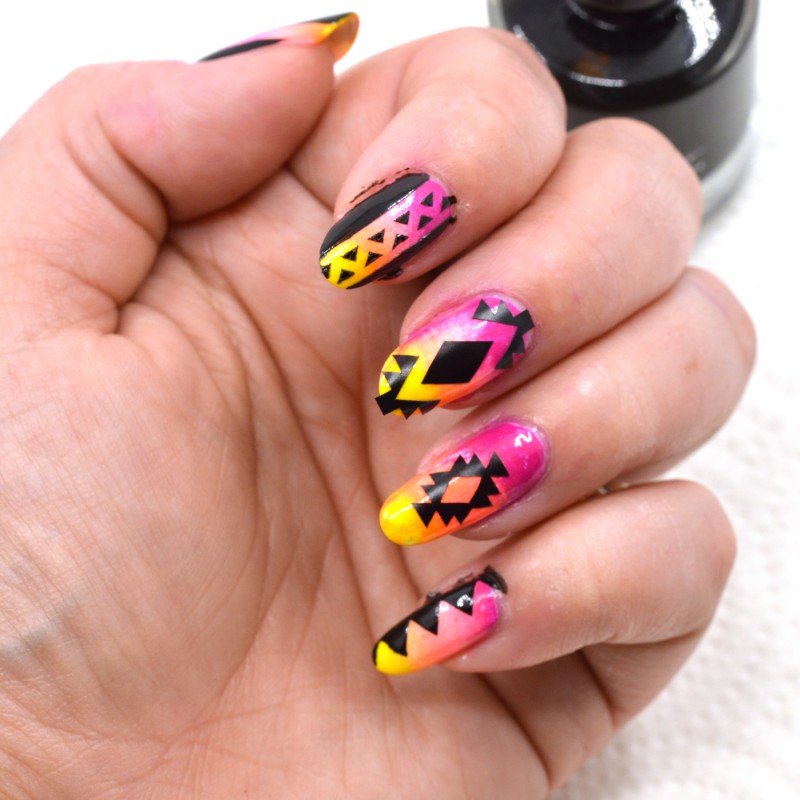
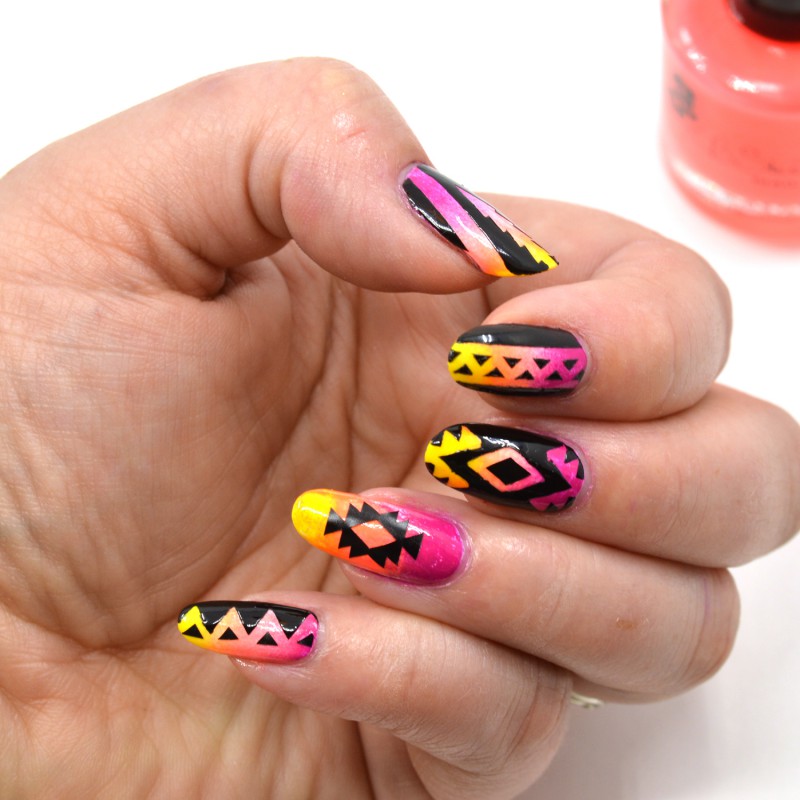
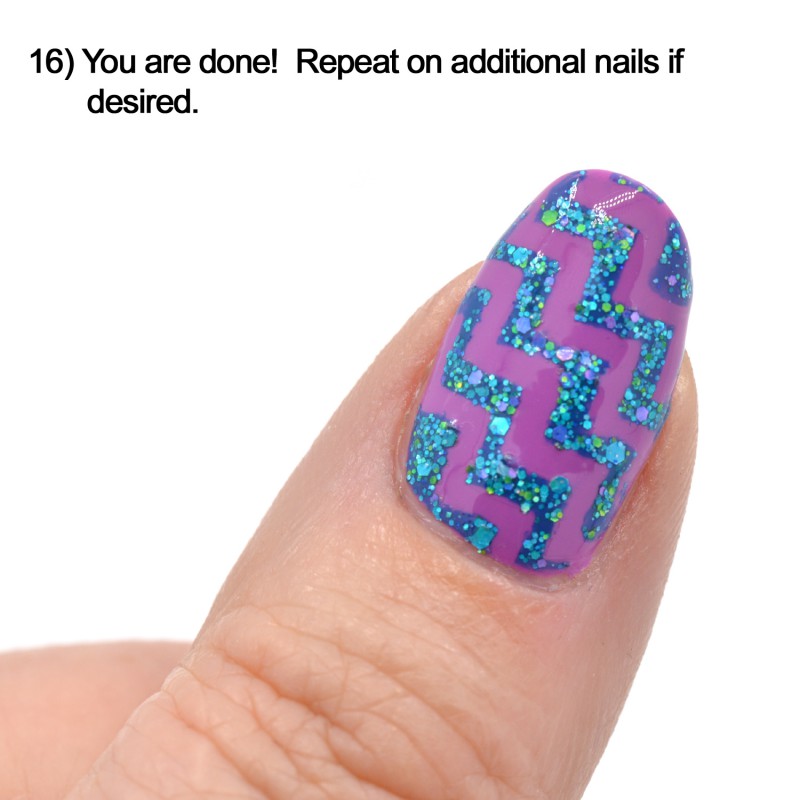
Finished nails!!  Repeat on additional nails if desired, or use technique as an accent nail.

DecalTutorialStep16


We think our new nail vinyl decals are a easy way to add a fun look to manicures.  Do you have a manicure using KBShimmer nail vinyl decals and polishes?  Send it to us to share on our website and social media outlets.  customerservice@kbshimmer.com  We would love to see them!


NailVinylDecaCollegeNormall

Gradient Tribal Nail Art Using KBShimmer Nail Vinyl Decals

TribalSheetWeeded

Nail vinyl decals are a fun way to add art and design to your manicure.  Today, I am going to show you step by step how to create the summer look below using a gradient technique with Life Rose On, You’re So Shellfish and Chick Me Out along with Eclipse and our new Tribal Themed Nail Vinyl Decals.

Step34


First, start with a white base to make the gradient colors pop.  I used a white from Wet and Wild, but any white will do.  You can see the white on my middle two fingers.

Step1

Next, using a cosmetic wedge, paint on a stripe of each color.  I did this twice for each color as the sponge sucks in the polish.

Step2

Take the sponge and position above nail you want to paint.  In a dabbing motion, use sponge to apply polish to nails.  Try and move it top to bottom a tiny bit to blend the color.  Do this quickly and lightly, as too many dabs or lots of pressure will pick up the polish from the nail leaving bald spots.

Step3

Step4

Repeat on additional nails by again painting stripes on the wedge, touch up any blank spots around nail edge with corner of sponge.

Step5

Clean up fingers with acetone and brush.  Cleaning up now will make additional clean-up easier later in the process.

Step6


Here is the look after clean-up.

Step7

At this point, you can just let the colors dry.  But I like to use Clearly On Top to ensure that the polish is completely dry before moving on to the next step.

Step8

Either way, make sure to wait at least 20 minutes before moving on to the next step so vinyl decals do not ruin polish when removed later on.  Adding a top coat will also help smooth out the look of the gradient and, if you happen to get some polish that seeps under the vinyl decals, the clear coat will provide enough of a barrier between the gradient design that you can use a clean up brush and acetone to remove it.

Step9

When removing nail vinyl decals from the sheet, I like to use a tweezer to grab and place vinyl.  These fine point Tweezerman tweezers are my go to.  Some pieces may have additional cutouts inside that need to be removed before use.

Step10

I remove the desired vinyl pieces from the sheet and place on my hand.  I then remove and place on my hand once more for pieces I want to later remove (those being used like stencils).  This will help remove some of the adhesive that can pull up polish (if polish is not fully dry).

Step11

Using your tweezers, place the vinyl decals into nails in the desired positions.  Press firmly to ensure that polish will not seep under vinyl decals.  Some of these pieces will actually stay on the nail, but for longer pieces like straight lines, let one end overlap the nail for easier removal later.

Step12

We will start with the pinky nail. Paint on a coat of Eclipse, a black cream.  Use a polish that covers in one coat, as you do not want polish to dry before removing vinyl and do not have time for multiple coats.

Step13

Here is the pinky nail covered with paint.  Wait not more then 20-30 seconds before removing vinyl.  If using a quick dry polish, remove right after you finish painting.  Only paint one nail at a time, if you do more the polish may dry before all pieces are removed.

Step14

Using your tweezers, remove vinyl by pulling the free edge up that touches the skin or hangs off the end of the nail. Pull away from your nail in a steady motion.

Step15

Step16

Then, move onto the point finger nail and repeat process on that nail.

Step17

Step18

Step20

The thumb is next.  The thumb has three pieces to remove.

Step21

Step22

Step23

Next, we will move to the middle finger.  This finger has two pieces that overlap for easy removal, and in the middle, the large diamond will also be removed.  Since there are no areas of the diamond, we will use a different technique for removal.

Step24

Paint the nail like the others. Quickly remove both the upper and lower stepped vinyl decals.

Step25

Using the pointy tip of the tweezers, carefully pierce the center of the diamond vinyl.  “Hook” the tip of the tweezers, and pinch tips to help pull up the diamond piece.  You can also use a safety pin.  If you prefer, you can also try and catch the edge of the diamond and pull up to remove.

Step26

Here is it removed.  At this point, the ring finger has a vinyl piece on that we will be leaving in place as a nail sticker. Clean up excess polish on cuticles as done previously with brush and acetone.

Step27

We can also use the bonus smaller diamonds and triangles as accent pieces.  For the middle finger, we will be using a smaller diamond from inside the ring finger piece.

Step28

Center  in the blank diamond area and place on the nail with the tweezers.  Press down firmly.

Step29

From the pointer finger vinyl decal pattern, we can pull tiny triangles to use as accents on the pink nail.

Step30

Place on the pinky in desired positions.

Step31

When last decals are placed, ensure all pieces are stuck to the nail by pressing firmly and follow with 1-2 coats of Clearly On Top to add shine and a protective finish to the nails.  It is perfectly fine to use top coat over the vinyl decals to seal in place. Nail Vinyl decals are not reusable.

Step32

There you go!  A fun, summery tribal look made easy with vinyl decals.

Step33

Step34


2014 KBShimmer Summer Collection


Summer Collection Set For Release June 20th, 2014

We are excited to announce the addition of 12 new colors launching this Friday  10 glittery shades and two bold creams will be added.

We adore glitter top coats and with almost a dozen creams in our collection it was time to bring more glitter pairings to our line. We are adding 4 new glitter top coats that pair well with many of our cream polishes. In addition, we are bringing in two new cream colors, including a near neon peachy orange ideal for pedicures, and a cream inspired by the 2014 Pantone color of the year, Radiant Orchid. We are also bringing in more creally and jelly polishes to round out the summer collection.

In addition to polish, we are branching into nail art products with 6 varieties of nail vinyl decal sheets. Nail art is a booming area in the fashion and beauty industry. Even so, nail art is not always easy to create for the home polish lover. I struggle myself with more complicated designs.  With these nail vinyl decals, it is a breeze for the home user to create wearable nail art that looks professional.  Come back soon for nail vinyl tutorials.

Nail vinyl decal sheets will retail for $5 each. Each glitter polish will retail for $8.75 per 15 ml bottle, while the creams will retail for just $7.50 per 15 ml bottle.

BIG THANKS to Gabi from Lacquer Loon for the swatches below.  Follow her at https://www.facebook.com/LacquerLoon and on IG @lacquerloon

 SummerCollege

The Glitters & Holos:

 IMG_20140612_175248

SkinnyMixedPeelings

Mixed Peelings – A creamy off white polish with citrus and fruit colored glitters in neon green, lemon yellow and watermelon pink.

IMG_20140612_195639

SkinnyLookHighAndHolo

Look High And Holo – A raspberry jelly with a rainbows worth of holographic glitters in hexes and squares.

IMG_20140612_185746

SkinnyPeakMyInterest

Peak My Interest – A melon pink colored polish with triangle glitters in white, pink and dark aqua.

IMG_20140612_193114

SkinnySeaYouAround

Sea You Around- This deep emerald green near teal jelly features fuchsia and silver circle glitters, light blue squares hexes in a base with scattered fuchsia micro slivers and micro sparkle.

IMG_20140612_110045

SkinnyMintalVacation1

Mint-al Vacation- This light aqua seafoam has two personalities. In low light, is has a beautiful white shimmer, but in the sun or bright light, you can see a holographic rainbow of color.

PerwinkleInTimeLacquerLoon

SkinnyPeriwinkleInTime2

Periwinkle In Time – A periwinkle colored creally polish loaded with holographic glitters in aqua, navy blue, sliver and violet.

Glitter Top Coats:

IMG_20140612_223429 

SkinnyScribbleMeThis

Scribble Me This – A graffiti inspired glitter top coat featuring mini stars, triangles, and neon glitters.

IMG_20140612_223018

SkinnySweetWave

Sweet Wave – A Bright pastel candy inspired glitter top coat with white, mint, periwinkle and watermelon colored glitters.

IMG_20140612_220943

SkinnyRedWhiteAndBluetiful

Red, White & Blue-tiful – A limited edition top coat with mini red, holographic sliver and holographic blue stars. Small red, silver and navy blue glitters along with micro holographic sparkles complete this patriotic polish.

IMG_20140612_224002

SkinnyHappilyEverAster

Happily Ever Aster – A floral inspired glitter top coat with purple, lavender, light aqua and white glitters swimming in a sparkling base.

The Creams:

IMG_20140612_204336

Radiant Orchid – Radiant Orchid, 2014 color of the year, is the ideal shade to transition nails from spring to summer and even fall.  This pink toned purple has fuchsia and mauve undertones.

IMG_20140612_214310

SkinnyYoureSoShellfish

You’re So Shellfish – Near neon peachy orange perfect for summer pedicures.

Nail Vinyl Decals:

DecalCollege


KBShimmer products can be found at Http://www.KBShimmer.com. For sales outside of the US visit http://www.HarlowandCo.org.

KBShimmer was founded in 2008 by the husband and wife team of Jason and Christy Rose. KBShimmer offers unique and colorful nail glitter nail polishes that are Big 3 Free, with all glitter formulas being completely free of chemicals such as toluene, formaldehyde, formaldehyde resin and dibutyl phthalate (DBP). KBShimmer glitter polishes feature a flat glitter grabbing brush for easy application. KBShimmer also offers a 2-free quick dry polish top coat, olive oil lotion, sugar scrubs, lip balms, cold process soaps and other skin care products.

###

If you would like more information about KBShimmer, contact Christy Rose by emailing sales@kbshimmer.com or visiting Http://www.KBShimmer.com.

© 2014 KBShimmer. All rights reserved